Saturday, 25 January 2025

Building a Charming Wooden Showcase for Your Child's Playroom

Transform your child's playroom into a magical space with a custom-built wooden showcase! This project is surprisingly achievable, even for novice woodworkers. Forget generic plastic toy bins â€" imagine a beautiful, handcrafted display for your little one's prized possessions, fostering organization and sparking their imagination. This guide walks you through each step, ensuring you build a sturdy and charming showcase perfect for their treasures.

Gathering Your Materials and Tools

Before you start hammering, gather your supplies. Accurate measurements are key for a well-fitting showcase. Use a tape measure to determine the desired dimensions, bearing in mind the space available in your playroom. A simple rectangular design is perfect for beginners. Remember to always prioritize safety; wear safety glasses and gloves throughout the process.

Essential Materials:

  • Wooden boards (pine or cedar are excellent choices for their affordability and workability)
  • Wood glue
  • Wood screws (various lengths)
  • Sandpaper (various grits)
  • Wood stain or paint (choose child-safe options)
  • Clear varnish or sealant (for protection)
  • Optional: decorative hardware (knobs, hinges)

Essential Tools:

  • Measuring tape
  • Saw (circular saw or hand saw)
  • Drill with various drill bits
  • Screwdriver
  • Safety glasses
  • Work gloves
  • Sanding block or electric sander
  • Paintbrushes or rollers

Constructing the Showcase Frame

Start by cutting the wooden boards to your desired dimensions. Accuracy is paramount here; use a miter saw for precise cuts if possible. Once all your pieces are cut, use wood glue and screws to assemble the frame. Ensure the corners are square and secure by pre-drilling pilot holes before inserting the screws; this prevents the wood from splitting. Clamp the pieces together while the glue dries for optimal adhesion. After the glue has fully dried, reinforce the joints with wood screws for extra strength and durability.

Adding Shelves and Finishing Touches

Measure and cut the shelves to fit inside the frame. Again, use wood glue and screws to attach them securely to the frame's sides, ensuring they are evenly spaced. Consider adding decorative edging to the shelves for an enhanced aesthetic appeal. After all the shelves are securely in place, use sandpaper to smooth out any rough edges or imperfections. This step is crucial for a polished, professional look. Begin with coarser grit sandpaper and gradually move to finer grits for a super-smooth finish.

Applying the Finish:

Once the sanding is complete, apply your chosen wood stain or paint. Apply several thin coats, allowing each coat to dry completely before applying the next. Follow the manufacturer's instructions for drying times. After the paint or stain has dried, finish the project by applying a clear varnish or sealant for protection and durability. This will safeguard the showcase from scratches and spills, essential for a children’s playroom.

Installation and Display

Once the finish is completely dry, carefully place the showcase in its designated spot in the playroom. You may wish to secure it to the wall for added stability, especially if you anticipate it being frequently accessed by your child. Finally, fill the showcase with your child's treasured toys, books, and artwork. Enjoy the satisfying accomplishment of creating a custom piece that both organizes and beautifies your child's playroom.

Building a Charming Wooden Showcase for Your Child's Playroom

Transform your child's playroom into a magical space with a custom-built wooden showcase! This project is surprisingly achievable, even for novice woodworkers. Forget generic plastic toy bins â€" imagine a beautiful, handcrafted display for your little one's prized possessions, fostering organization and sparking their imagination. This guide walks you through each step, ensuring you build a sturdy and charming showcase perfect for their treasures.

Gathering Your Materials and Tools

Before you start hammering, gather your supplies. Accurate measurements are key for a well-fitting showcase. Use a tape measure to determine the desired dimensions, bearing in mind the space available in your playroom. A simple rectangular design is perfect for beginners. Remember to always prioritize safety; wear safety glasses and gloves throughout the process.

Essential Materials:

  • Wooden boards (pine or cedar are excellent choices for their affordability and workability)
  • Wood glue
  • Wood screws (various lengths)
  • Sandpaper (various grits)
  • Wood stain or paint (choose child-safe options)
  • Clear varnish or sealant (for protection)
  • Optional: decorative hardware (knobs, hinges)

Essential Tools:

  • Measuring tape
  • Saw (circular saw or hand saw)
  • Drill with various drill bits
  • Screwdriver
  • Safety glasses
  • Work gloves
  • Sanding block or electric sander
  • Paintbrushes or rollers

Constructing the Showcase Frame

Start by cutting the wooden boards to your desired dimensions. Accuracy is paramount here; use a miter saw for precise cuts if possible. Once all your pieces are cut, use wood glue and screws to assemble the frame. Ensure the corners are square and secure by pre-drilling pilot holes before inserting the screws; this prevents the wood from splitting. Clamp the pieces together while the glue dries for optimal adhesion. After the glue has fully dried, reinforce the joints with wood screws for extra strength and durability.

Adding Shelves and Finishing Touches

Measure and cut the shelves to fit inside the frame. Again, use wood glue and screws to attach them securely to the frame's sides, ensuring they are evenly spaced. Consider adding decorative edging to the shelves for an enhanced aesthetic appeal. After all the shelves are securely in place, use sandpaper to smooth out any rough edges or imperfections. This step is crucial for a polished, professional look. Begin with coarser grit sandpaper and gradually move to finer grits for a super-smooth finish.

Applying the Finish:

Once the sanding is complete, apply your chosen wood stain or paint. Apply several thin coats, allowing each coat to dry completely before applying the next. Follow the manufacturer's instructions for drying times. After the paint or stain has dried, finish the project by applying a clear varnish or sealant for protection and durability. This will safeguard the showcase from scratches and spills, essential for a children’s playroom.

Installation and Display

Once the finish is completely dry, carefully place the showcase in its designated spot in the playroom. You may wish to secure it to the wall for added stability, especially if you anticipate it being frequently accessed by your child. Finally, fill the showcase with your child's treasured toys, books, and artwork. Enjoy the satisfying accomplishment of creating a custom piece that both organizes and beautifies your child's playroom.

Outdoor Dining Tables: A Comprehensive Guide to Weather-Resistant Materials

The allure of alfresco dining is undeniable. Sharing meals surrounded by nature, bathed in sunlight or illuminated by starlight, elevates the culinary experience. However, the harsh realities of outdoor elements â€" sun, rain, snow, and fluctuating temperatures â€" demand careful consideration when selecting outdoor furniture. The cornerstone of any outdoor dining area is the table, and its durability is paramount. This comprehensive guide explores the diverse range of weather-resistant materials available for outdoor dining tables, assisting you in making an informed decision that balances aesthetics, longevity, and budget.

Understanding the Challenges of Outdoor Environments

Before delving into specific materials, it's crucial to understand the challenges they must withstand. Outdoor furniture faces constant exposure to a variety of environmental aggressors:

UV Degradation:

Prolonged exposure to ultraviolet (UV) radiation from sunlight causes fading, cracking, and weakening of many materials. This degradation can significantly reduce the lifespan and aesthetic appeal of your outdoor dining table.

Moisture Damage:

Rain, snow, and humidity can lead to warping, rotting, rusting, and the growth of mold and mildew. Water ingress can also damage internal structures, compromising stability and longevity.

Temperature Fluctuations:

Extreme temperature variations, especially between hot and cold periods, cause expansion and contraction of materials. This can lead to cracking, splitting, and weakening over time.

Wind and Debris:

Strong winds can damage furniture, especially lighter materials. Falling debris, such as branches or leaves, can cause scratches and other cosmetic damage.

Popular Weather-Resistant Materials for Outdoor Dining Tables

A variety of materials are designed to withstand the rigors of outdoor use. Each presents a unique combination of advantages and disadvantages, influencing the ultimate choice for your specific needs and preferences.

Aluminum:

Aluminum is a lightweight yet surprisingly strong metal that is highly resistant to rust and corrosion. It’s relatively inexpensive compared to other metals, making it a popular choice for budget-conscious consumers. Powder-coated aluminum offers enhanced protection against UV degradation and scratching. However, aluminum can dent easily if subjected to significant impact. Its lightweight nature can also make it susceptible to being blown over in strong winds.

Wrought Iron:

Wrought iron is a classic choice for outdoor dining tables, known for its strength, durability, and elegant aesthetic. It is exceptionally resistant to weathering and can last for decades with minimal maintenance. However, wrought iron is significantly heavier than aluminum, requiring careful consideration of placement and potential difficulty in moving. It also tends to be more expensive than aluminum.

Steel:

Steel offers a good balance of strength, durability, and affordability. Powder-coating or galvanization protects against rust, enhancing its lifespan. However, uncoated steel is susceptible to rusting, requiring regular maintenance. Steel, like wrought iron, can be heavy and require careful handling.

Wood:

Certain wood species, such as teak, cedar, and redwood, are naturally resistant to rot and decay due to their high oil content and density. These hardwoods require less maintenance than softer woods but still benefit from regular cleaning and occasional sealing to enhance their weather resistance. They are more expensive than other options and can be susceptible to warping or cracking if not properly cared for.

Plastic/Resin:

Plastic and resin materials, often used in combination, offer affordability and low maintenance. They are lightweight and easy to clean. However, these materials are typically less durable than metal or high-quality wood, and can fade or become brittle over time with prolonged sun exposure. Their aesthetic appeal may also be considered less refined than other options.

Concrete:

Concrete is a highly durable and weather-resistant material that provides a modern and robust look. It is extremely resistant to the elements and will last for many years. However, concrete tables are very heavy and require significant effort to move or adjust. They can also be susceptible to cracking if subjected to significant impact.

Stone:

Stone, including granite, slate, and marble, provides an elegant and luxurious feel. It's incredibly durable and resistant to weather damage. However, stone tables are exceptionally heavy and expensive. They require professional installation and may be susceptible to chipping or cracking under significant impact. The natural variations in color and texture can also be considered both an advantage and a disadvantage, depending on personal preference.

Choosing the Right Material for Your Needs

Selecting the optimal material for your outdoor dining table depends on several factors:

  • Budget: Aluminum and plastic are generally the most affordable, while stone and high-quality wood are the most expensive.
  • Durability: Stone, wrought iron, and high-quality hardwoods offer superior durability, while aluminum and plastic are less resistant to damage.
  • Maintenance: Plastic and aluminum require minimal maintenance, while wood and wrought iron benefit from periodic cleaning and sealing.
  • Aesthetic Preferences: Consider the overall style of your outdoor space and choose a material that complements your existing décor.
  • Climate: In areas with extreme weather conditions, selecting exceptionally durable materials like stone or high-quality wood is recommended.

Careful consideration of these factors will guide you towards selecting a weather-resistant outdoor dining table that meets your specific needs and enhances your outdoor dining experience for years to come. Remember to always consult with a reputable furniture retailer or specialist for tailored advice based on your individual circumstances and local climate.

Outdoor Dining Tables: A Comprehensive Guide to Weather-Resistant Materials

The allure of alfresco dining is undeniable. Sharing meals surrounded by nature, bathed in sunlight or illuminated by starlight, elevates the culinary experience. However, the harsh realities of outdoor elements â€" sun, rain, snow, and fluctuating temperatures â€" demand careful consideration when selecting outdoor furniture. The cornerstone of any outdoor dining area is the table, and its durability is paramount. This comprehensive guide explores the diverse range of weather-resistant materials available for outdoor dining tables, assisting you in making an informed decision that balances aesthetics, longevity, and budget.

Understanding the Challenges of Outdoor Environments

Before delving into specific materials, it's crucial to understand the challenges they must withstand. Outdoor furniture faces constant exposure to a variety of environmental aggressors:

UV Degradation:

Prolonged exposure to ultraviolet (UV) radiation from sunlight causes fading, cracking, and weakening of many materials. This degradation can significantly reduce the lifespan and aesthetic appeal of your outdoor dining table.

Moisture Damage:

Rain, snow, and humidity can lead to warping, rotting, rusting, and the growth of mold and mildew. Water ingress can also damage internal structures, compromising stability and longevity.

Temperature Fluctuations:

Extreme temperature variations, especially between hot and cold periods, cause expansion and contraction of materials. This can lead to cracking, splitting, and weakening over time.

Wind and Debris:

Strong winds can damage furniture, especially lighter materials. Falling debris, such as branches or leaves, can cause scratches and other cosmetic damage.

Popular Weather-Resistant Materials for Outdoor Dining Tables

A variety of materials are designed to withstand the rigors of outdoor use. Each presents a unique combination of advantages and disadvantages, influencing the ultimate choice for your specific needs and preferences.

Aluminum:

Aluminum is a lightweight yet surprisingly strong metal that is highly resistant to rust and corrosion. It’s relatively inexpensive compared to other metals, making it a popular choice for budget-conscious consumers. Powder-coated aluminum offers enhanced protection against UV degradation and scratching. However, aluminum can dent easily if subjected to significant impact. Its lightweight nature can also make it susceptible to being blown over in strong winds.

Wrought Iron:

Wrought iron is a classic choice for outdoor dining tables, known for its strength, durability, and elegant aesthetic. It is exceptionally resistant to weathering and can last for decades with minimal maintenance. However, wrought iron is significantly heavier than aluminum, requiring careful consideration of placement and potential difficulty in moving. It also tends to be more expensive than aluminum.

Steel:

Steel offers a good balance of strength, durability, and affordability. Powder-coating or galvanization protects against rust, enhancing its lifespan. However, uncoated steel is susceptible to rusting, requiring regular maintenance. Steel, like wrought iron, can be heavy and require careful handling.

Wood:

Certain wood species, such as teak, cedar, and redwood, are naturally resistant to rot and decay due to their high oil content and density. These hardwoods require less maintenance than softer woods but still benefit from regular cleaning and occasional sealing to enhance their weather resistance. They are more expensive than other options and can be susceptible to warping or cracking if not properly cared for.

Plastic/Resin:

Plastic and resin materials, often used in combination, offer affordability and low maintenance. They are lightweight and easy to clean. However, these materials are typically less durable than metal or high-quality wood, and can fade or become brittle over time with prolonged sun exposure. Their aesthetic appeal may also be considered less refined than other options.

Concrete:

Concrete is a highly durable and weather-resistant material that provides a modern and robust look. It is extremely resistant to the elements and will last for many years. However, concrete tables are very heavy and require significant effort to move or adjust. They can also be susceptible to cracking if subjected to significant impact.

Stone:

Stone, including granite, slate, and marble, provides an elegant and luxurious feel. It's incredibly durable and resistant to weather damage. However, stone tables are exceptionally heavy and expensive. They require professional installation and may be susceptible to chipping or cracking under significant impact. The natural variations in color and texture can also be considered both an advantage and a disadvantage, depending on personal preference.

Choosing the Right Material for Your Needs

Selecting the optimal material for your outdoor dining table depends on several factors:

  • Budget: Aluminum and plastic are generally the most affordable, while stone and high-quality wood are the most expensive.
  • Durability: Stone, wrought iron, and high-quality hardwoods offer superior durability, while aluminum and plastic are less resistant to damage.
  • Maintenance: Plastic and aluminum require minimal maintenance, while wood and wrought iron benefit from periodic cleaning and sealing.
  • Aesthetic Preferences: Consider the overall style of your outdoor space and choose a material that complements your existing décor.
  • Climate: In areas with extreme weather conditions, selecting exceptionally durable materials like stone or high-quality wood is recommended.

Careful consideration of these factors will guide you towards selecting a weather-resistant outdoor dining table that meets your specific needs and enhances your outdoor dining experience for years to come. Remember to always consult with a reputable furniture retailer or specialist for tailored advice based on your individual circumstances and local climate.

Friday, 24 January 2025

Crafting Bespoke Wooden Wall Signs: A Comprehensive Guide

The creation of personalized wooden wall signs offers a unique avenue for artistic expression and personalized home décor. This comprehensive guide delves into the meticulous process, from initial design conception to the final application of finishing touches, enabling the artisan to produce high-quality, bespoke pieces. The techniques outlined below are applicable to both novice and experienced woodworkers, providing a structured framework for achieving professional results.

Phase 1: Design and Preparation

Conceptualization and Sketching

The initial phase involves the meticulous conceptualization of the sign's design. This requires a clear understanding of the intended message, aesthetic, and target audience. Consider the overall styleâ€"rustic, modern, minimalist, or ornateâ€"and select fonts and imagery accordingly. Detailed sketching is crucial at this stage. Explore several design options, experimenting with different layouts, font sizes, and graphic elements to achieve the desired visual impact. Accurate dimensions should be noted, taking into account the chosen wood type and desired overall size. Digital design tools can supplement hand-drawn sketches, allowing for easier manipulation and refinement before committing to the final design.

Material Selection and Acquisition

The choice of wood significantly impacts the final aesthetic and durability of the sign. Hardwoods such as oak, maple, and cherry offer exceptional strength and a refined finish, lending themselves well to intricate details and long-lasting appeal. Softwoods like pine and fir are more readily available and cost-effective but may require additional care to prevent damage. Consider the grain pattern and color variations inherent in each wood type; these natural characteristics can either be accentuated or minimized, depending on the overall design intent. Ensure the selected wood is properly seasoned to minimize warping and cracking during the crafting process. The wood should be free of knots and imperfections that might compromise the structural integrity or aesthetic appeal of the finished product.

Tools and Equipment

A well-equipped workshop is essential for crafting high-quality wooden signs. The necessary tools and equipment will vary depending on the complexity of the design, but a basic set includes:

  • Measuring tape and pencil
  • Jigsaw or bandsaw (for cutting the wood to shape)
  • Hand plane or electric planer (for smoothing the wood surface)
  • Sandpaper (various grits, from coarse to fine)
  • Router (for creating decorative edges or lettering)
  • Drill and drill bits (for pilot holes and mounting hardware)
  • Clamps (for holding pieces securely during assembly)
  • Paintbrushes or stencils (for applying paint or stain)
  • Wood stain, paint, and sealant
  • Safety glasses and dust mask

Phase 2: Construction and Assembly

Cutting and Shaping

Once the design is finalized and the wood selected, the next step involves precise cutting and shaping of the wooden base. Use the pre-determined dimensions from the design sketches to accurately cut the wood using a jigsaw or bandsaw. Pay close attention to detail to ensure clean, straight cuts. If the design calls for intricate shapes or curves, employing a bandsaw offers greater precision. After cutting, smooth the edges using a hand plane or electric planer, followed by sanding with progressively finer grits of sandpaper to achieve a smooth, even surface. This meticulous sanding process is crucial for a professional finish, eliminating any imperfections that could be visible in the final product.

Engraving or Painting

The chosen design is then transferred onto the prepared wood. This can involve various techniques depending on the design's intricacy. Simple designs might be freehand painted, while more complex designs might require the use of stencils or router-based engraving. If engraving is selected, a router fitted with appropriate bits can be used to carve out the lettering or designs. For painted designs, several coats of paint may be necessary to achieve the desired opacity and vibrancy. Carefully apply the paint or stain, allowing each coat to dry completely before proceeding to the next. The use of stencils provides a more precise and professional result, especially for intricate lettering. For delicate designs, airbrushing may be considered to achieve fine detail and even color application.

Finishing Touches and Assembly

After the lettering or painting is complete, a protective sealant should be applied to preserve the sign and protect the design. Various sealants are available, ranging from clear coats to those offering a matte or glossy finish. Multiple thin coats, carefully applied and allowed to dry completely, will provide optimal protection. For added durability, a UV-resistant sealant can be employed to prevent fading from sun exposure. Once the sealant is dry, hardware such as D-rings or sawtooth hangers can be attached to the back of the sign to facilitate easy hanging. Precise drilling and secure fastening are essential to prevent the sign from becoming loose or unstable.

Phase 3: Quality Control and Refinement

Inspection and Correction

Before deeming the project complete, a thorough inspection is crucial. Examine the sign carefully for any imperfections, including uneven paint application, scratches, or chipped edges. Any imperfections should be addressed before final packaging. Re-sanding, repainting, or resealing might be necessary to rectify any identified flaws. This meticulous attention to detail ensures a professional and high-quality final product.

Packaging and Presentation

Finally, the finished sign should be carefully packaged to protect it during transport or storage. Wrapping the sign in bubble wrap or protective paper and placing it in a sturdy box provides adequate protection. Consider including a personalized card or note to enhance the customer experience, conveying appreciation for their patronage. For high-end or commissioned pieces, presentation is particularly important, potentially involving custom packaging and delivery methods.

By following these steps, artisans can craft personalized wooden wall signs that are not merely functional, but also serve as unique works of art, reflecting the creator's skill and the client's individual preferences. The investment in quality materials, precise craftsmanship, and thoughtful attention to detail ensures a lasting piece of personalized décor.

Crafting Bespoke Wooden Wall Signs: A Comprehensive Guide

The creation of personalized wooden wall signs offers a unique avenue for artistic expression and personalized home décor. This comprehensive guide delves into the meticulous process, from initial design conception to the final application of finishing touches, enabling the artisan to produce high-quality, bespoke pieces. The techniques outlined below are applicable to both novice and experienced woodworkers, providing a structured framework for achieving professional results.

Phase 1: Design and Preparation

Conceptualization and Sketching

The initial phase involves the meticulous conceptualization of the sign's design. This requires a clear understanding of the intended message, aesthetic, and target audience. Consider the overall styleâ€"rustic, modern, minimalist, or ornateâ€"and select fonts and imagery accordingly. Detailed sketching is crucial at this stage. Explore several design options, experimenting with different layouts, font sizes, and graphic elements to achieve the desired visual impact. Accurate dimensions should be noted, taking into account the chosen wood type and desired overall size. Digital design tools can supplement hand-drawn sketches, allowing for easier manipulation and refinement before committing to the final design.

Material Selection and Acquisition

The choice of wood significantly impacts the final aesthetic and durability of the sign. Hardwoods such as oak, maple, and cherry offer exceptional strength and a refined finish, lending themselves well to intricate details and long-lasting appeal. Softwoods like pine and fir are more readily available and cost-effective but may require additional care to prevent damage. Consider the grain pattern and color variations inherent in each wood type; these natural characteristics can either be accentuated or minimized, depending on the overall design intent. Ensure the selected wood is properly seasoned to minimize warping and cracking during the crafting process. The wood should be free of knots and imperfections that might compromise the structural integrity or aesthetic appeal of the finished product.

Tools and Equipment

A well-equipped workshop is essential for crafting high-quality wooden signs. The necessary tools and equipment will vary depending on the complexity of the design, but a basic set includes:

  • Measuring tape and pencil
  • Jigsaw or bandsaw (for cutting the wood to shape)
  • Hand plane or electric planer (for smoothing the wood surface)
  • Sandpaper (various grits, from coarse to fine)
  • Router (for creating decorative edges or lettering)
  • Drill and drill bits (for pilot holes and mounting hardware)
  • Clamps (for holding pieces securely during assembly)
  • Paintbrushes or stencils (for applying paint or stain)
  • Wood stain, paint, and sealant
  • Safety glasses and dust mask

Phase 2: Construction and Assembly

Cutting and Shaping

Once the design is finalized and the wood selected, the next step involves precise cutting and shaping of the wooden base. Use the pre-determined dimensions from the design sketches to accurately cut the wood using a jigsaw or bandsaw. Pay close attention to detail to ensure clean, straight cuts. If the design calls for intricate shapes or curves, employing a bandsaw offers greater precision. After cutting, smooth the edges using a hand plane or electric planer, followed by sanding with progressively finer grits of sandpaper to achieve a smooth, even surface. This meticulous sanding process is crucial for a professional finish, eliminating any imperfections that could be visible in the final product.

Engraving or Painting

The chosen design is then transferred onto the prepared wood. This can involve various techniques depending on the design's intricacy. Simple designs might be freehand painted, while more complex designs might require the use of stencils or router-based engraving. If engraving is selected, a router fitted with appropriate bits can be used to carve out the lettering or designs. For painted designs, several coats of paint may be necessary to achieve the desired opacity and vibrancy. Carefully apply the paint or stain, allowing each coat to dry completely before proceeding to the next. The use of stencils provides a more precise and professional result, especially for intricate lettering. For delicate designs, airbrushing may be considered to achieve fine detail and even color application.

Finishing Touches and Assembly

After the lettering or painting is complete, a protective sealant should be applied to preserve the sign and protect the design. Various sealants are available, ranging from clear coats to those offering a matte or glossy finish. Multiple thin coats, carefully applied and allowed to dry completely, will provide optimal protection. For added durability, a UV-resistant sealant can be employed to prevent fading from sun exposure. Once the sealant is dry, hardware such as D-rings or sawtooth hangers can be attached to the back of the sign to facilitate easy hanging. Precise drilling and secure fastening are essential to prevent the sign from becoming loose or unstable.

Phase 3: Quality Control and Refinement

Inspection and Correction

Before deeming the project complete, a thorough inspection is crucial. Examine the sign carefully for any imperfections, including uneven paint application, scratches, or chipped edges. Any imperfections should be addressed before final packaging. Re-sanding, repainting, or resealing might be necessary to rectify any identified flaws. This meticulous attention to detail ensures a professional and high-quality final product.

Packaging and Presentation

Finally, the finished sign should be carefully packaged to protect it during transport or storage. Wrapping the sign in bubble wrap or protective paper and placing it in a sturdy box provides adequate protection. Consider including a personalized card or note to enhance the customer experience, conveying appreciation for their patronage. For high-end or commissioned pieces, presentation is particularly important, potentially involving custom packaging and delivery methods.

By following these steps, artisans can craft personalized wooden wall signs that are not merely functional, but also serve as unique works of art, reflecting the creator's skill and the client's individual preferences. The investment in quality materials, precise craftsmanship, and thoughtful attention to detail ensures a lasting piece of personalized décor.

Build Your Own Stunning Wooden Ladder Shelf: A Step-by-Step Guide

Okay, friends, let's get our hands dirty and build something amazing! I'm talking about a gorgeous, functional wooden ladder shelf â€" the kind you see in all the home decor magazines, but way cheaper (and way more satisfying) to make yourself. This isn't some rocket science project; even if you're a beginner, you can totally do this. I'll walk you through every step, with tips and tricks along the way. Get ready to unleash your inner DIY guru!

Gathering Your Supplies: The Shopping List

Before we even think about sawing, let's get our ducks in a row (or, in this case, our lumber). Here's what you'll need. Don't stress about getting *exactly* these dimensions; you can adjust based on how big you want your shelf to be. Just remember to keep everything consistent!

The Wood

  • Two 1x4 boards, 8 feet long (for the sides of the ladder)
  • Five 1x12 boards, 12 inches long (for the shelves â€" you can adjust this number depending on how many shelves you want!)

Pro-Tip: Choose a wood you love! Pine is affordable and easy to work with, but hardwoods like oak or maple will give you a more luxurious look (and a longer-lasting shelf). Also, consider pre-finished boards to save time on staining and sealing.

The Hardware

  • Wood screws (2 1/2 inch â€" use exterior-grade screws for extra durability)
  • Wood glue
  • Sandpaper (various grits â€" 80, 120, and 220 are a good starting point)
  • Wood stain (your choice of color â€" or skip this step if you chose pre-finished boards)
  • Wood sealant (polyurethane is a popular option)
  • Level
  • Measuring tape
  • Pencil
  • Drill with drill bit the same size as your screws
  • Safety glasses

Safety First: Always wear safety glasses when working with power tools. It's not worth the risk of eye injury!

Building the Ladder: Let's Get Constructing!

Now for the fun part! This is where we turn those boards into a beautiful, functional ladder.

Marking and Drilling Pilot Holes

First, lay your two 8-foot 1x4s parallel to each other on a flat surface, about 12 inches apart. Using your pencil and measuring tape, mark the spots where you'll attach your shelves (evenly spaced is key here!). Now, for each mark, drill a pilot hole â€" this prevents the wood from splitting when you screw it in. Always start with pilot holes â€" trust me on this one!

Attaching the Shelves

Grab your 1x12 boards (your shelves!). Apply a generous bead of wood glue to the top edges of your 1x4s where you've made your markings. Then, position your shelf boards so they sit snugly against the 1x4s. Secure each shelf using two screws per side, screwing into the pilot holes you pre-drilled. Make sure you’re screwing straight and not stripping the wood (which sometimes happens). If your screws are too long, you’ll shoot them right through the shelf! Make sure to use a level at every step to ensure your masterpiece is perfectly plumb!

Sanding to Perfection

Once your ladder is fully assembled, it’s time for some TLC. Sand down all surfaces, paying attention to any rough edges or protruding screws. Start with coarser sandpaper (80 grit) for the bulk of the sanding, then move to finer grits (120 and 220) to achieve a smooth finish. Remember to wipe off the dust between each sanding stage to get a clear sense of your work.

Finishing Touches: The Glam Up

Your ladder shelf is structurally sound, but let's make it look absolutely stunning!

Staining (Optional)

If you're using unfinished wood, now's the time to stain it. Follow the instructions on your chosen stain; typically, this involves applying a thin, even coat, allowing it to dry, and potentially applying a second coat for deeper color. Make sure to work in a well-ventilated area, and protect your work surface!

Sealing the Deal

Once the stain is dry (check the can for drying times), apply a sealant (polyurethane is a great option) to protect your shelf from spills, scratches, and moisture. Apply several thin coats, sanding lightly between coats for a truly professional-looking finish. Let the sealant cure completely before using the shelf.

Placement and Enjoyment: The Grand Finale

Congratulations! You've built your very own gorgeous wooden ladder shelf. Find the perfect spot in your home â€" a living room, bedroom, or even a bathroom â€" and proudly display your handiwork. Load it up with books, plants, decorative items â€" anything that makes you happy! You deserve all the praise you’ll receive!

Commonly Asked Questions

Got questions? I bet you do! Here are some common queries I often get:

Q: Can I use different wood types for the sides and shelves?

A: Absolutely! Just be sure the woods are compatible in terms of density and expansion/contraction rates.

Q: How do I prevent the wood from splitting when screwing it?

A: Always pre-drill pilot holes! This is crucial to prevent cracking.

Q: What kind of wood glue is recommended?

A: A good quality wood glue like Titebond is a popular choice for woodworking projects.

Q: Can I build this shelf without power tools?

A: It's possible, but it will be much more time-consuming. You'll likely need to use hand saws and hand drills.

Q: How much weight can this shelf hold?

A: The weight capacity depends on the type of wood and the number of shelves. It's best to distribute weight evenly and avoid overloading any single shelf.

There you have it! Now go forth and create your own amazing ladder shelf. And remember to share pictures of your finished project â€" I’d love to see them! Happy building!

Build Your Own Stunning Wooden Ladder Shelf: A Step-by-Step Guide

Okay, friends, let's get our hands dirty and build something amazing! I'm talking about a gorgeous, functional wooden ladder shelf â€" the kind you see in all the home decor magazines, but way cheaper (and way more satisfying) to make yourself. This isn't some rocket science project; even if you're a beginner, you can totally do this. I'll walk you through every step, with tips and tricks along the way. Get ready to unleash your inner DIY guru!

Gathering Your Supplies: The Shopping List

Before we even think about sawing, let's get our ducks in a row (or, in this case, our lumber). Here's what you'll need. Don't stress about getting *exactly* these dimensions; you can adjust based on how big you want your shelf to be. Just remember to keep everything consistent!

The Wood

  • Two 1x4 boards, 8 feet long (for the sides of the ladder)
  • Five 1x12 boards, 12 inches long (for the shelves â€" you can adjust this number depending on how many shelves you want!)

Pro-Tip: Choose a wood you love! Pine is affordable and easy to work with, but hardwoods like oak or maple will give you a more luxurious look (and a longer-lasting shelf). Also, consider pre-finished boards to save time on staining and sealing.

The Hardware

  • Wood screws (2 1/2 inch â€" use exterior-grade screws for extra durability)
  • Wood glue
  • Sandpaper (various grits â€" 80, 120, and 220 are a good starting point)
  • Wood stain (your choice of color â€" or skip this step if you chose pre-finished boards)
  • Wood sealant (polyurethane is a popular option)
  • Level
  • Measuring tape
  • Pencil
  • Drill with drill bit the same size as your screws
  • Safety glasses

Safety First: Always wear safety glasses when working with power tools. It's not worth the risk of eye injury!

Building the Ladder: Let's Get Constructing!

Now for the fun part! This is where we turn those boards into a beautiful, functional ladder.

Marking and Drilling Pilot Holes

First, lay your two 8-foot 1x4s parallel to each other on a flat surface, about 12 inches apart. Using your pencil and measuring tape, mark the spots where you'll attach your shelves (evenly spaced is key here!). Now, for each mark, drill a pilot hole â€" this prevents the wood from splitting when you screw it in. Always start with pilot holes â€" trust me on this one!

Attaching the Shelves

Grab your 1x12 boards (your shelves!). Apply a generous bead of wood glue to the top edges of your 1x4s where you've made your markings. Then, position your shelf boards so they sit snugly against the 1x4s. Secure each shelf using two screws per side, screwing into the pilot holes you pre-drilled. Make sure you’re screwing straight and not stripping the wood (which sometimes happens). If your screws are too long, you’ll shoot them right through the shelf! Make sure to use a level at every step to ensure your masterpiece is perfectly plumb!

Sanding to Perfection

Once your ladder is fully assembled, it’s time for some TLC. Sand down all surfaces, paying attention to any rough edges or protruding screws. Start with coarser sandpaper (80 grit) for the bulk of the sanding, then move to finer grits (120 and 220) to achieve a smooth finish. Remember to wipe off the dust between each sanding stage to get a clear sense of your work.

Finishing Touches: The Glam Up

Your ladder shelf is structurally sound, but let's make it look absolutely stunning!

Staining (Optional)

If you're using unfinished wood, now's the time to stain it. Follow the instructions on your chosen stain; typically, this involves applying a thin, even coat, allowing it to dry, and potentially applying a second coat for deeper color. Make sure to work in a well-ventilated area, and protect your work surface!

Sealing the Deal

Once the stain is dry (check the can for drying times), apply a sealant (polyurethane is a great option) to protect your shelf from spills, scratches, and moisture. Apply several thin coats, sanding lightly between coats for a truly professional-looking finish. Let the sealant cure completely before using the shelf.

Placement and Enjoyment: The Grand Finale

Congratulations! You've built your very own gorgeous wooden ladder shelf. Find the perfect spot in your home â€" a living room, bedroom, or even a bathroom â€" and proudly display your handiwork. Load it up with books, plants, decorative items â€" anything that makes you happy! You deserve all the praise you’ll receive!

Commonly Asked Questions

Got questions? I bet you do! Here are some common queries I often get:

Q: Can I use different wood types for the sides and shelves?

A: Absolutely! Just be sure the woods are compatible in terms of density and expansion/contraction rates.

Q: How do I prevent the wood from splitting when screwing it?

A: Always pre-drill pilot holes! This is crucial to prevent cracking.

Q: What kind of wood glue is recommended?

A: A good quality wood glue like Titebond is a popular choice for woodworking projects.

Q: Can I build this shelf without power tools?

A: It's possible, but it will be much more time-consuming. You'll likely need to use hand saws and hand drills.

Q: How much weight can this shelf hold?

A: The weight capacity depends on the type of wood and the number of shelves. It's best to distribute weight evenly and avoid overloading any single shelf.

There you have it! Now go forth and create your own amazing ladder shelf. And remember to share pictures of your finished project â€" I’d love to see them! Happy building!

Custom Cutting Board Plans with Juice Groove for Easy Cleanup and Mess-Free Prep

Introduction: Elevating Culinary Functionality

The humble cutting board, a seemingly simple kitchen utensil, plays a pivotal role in culinary endeavors. Its functionality extends beyond merely providing a surface for chopping; it directly impacts food safety, efficiency, and the overall aesthetic of the kitchen environment. While commercially available cutting boards abound, crafting a custom cutting board offers unparalleled benefits, allowing for precise customization to meet individual needs and preferences. This comprehensive guide meticulously outlines the plans for constructing a superior cutting board, incorporating a crucial design element: a juice groove for effortless cleanup and mess-free food preparation.

I. Design Considerations: Tailoring the Cutting Board to Your Needs

A. Dimensions and Material Selection:

The dimensions of your custom cutting board should be dictated by the intended use and available counter space. Consider the size of typical items you prepare, ensuring adequate working area without compromising on portability. A standard size might range from 12" x 18" to 18" x 24", but larger or smaller dimensions can be easily adapted. Material selection significantly impacts durability, hygiene, and aesthetic appeal. Popular choices include:

  • Hardwood: Species like maple, cherry, walnut, and teak offer exceptional hardness, durability, and visual appeal. Hardwoods are naturally resistant to bacteria and offer superior longevity compared to softer woods. However, they are more expensive and require more meticulous finishing.
  • Softwood: Pine and fir are less expensive options, but they are softer and more prone to scratching and damage. Their porous nature also necessitates more rigorous sanitation practices. They are generally less suitable for heavy-duty use.
  • End Grain: Constructed from smaller pieces of wood arranged on their end, end-grain cutting boards offer unparalleled knife-friendliness and self-healing properties. The wood fibers are perpendicular to the cutting surface, minimizing damage to knife edges and reducing the risk of dulling. However, they are more complex to construct.
  • Synthetic Materials: Plastic and other synthetic materials are readily available, affordable, and easy to clean. However, they often lack the warmth and aesthetic appeal of wood and may not be as durable in the long run.

B. The Crucial Juice Groove: Design and Placement:

The incorporation of a juice groove is paramount to enhancing both functionality and hygiene. This groove, typically a recessed channel along the perimeter or a portion of the cutting board, effectively captures juices, oils, and other liquids that result from food preparation. This prevents spills, facilitates easy cleaning, and maintains a cleaner work surface. Careful consideration must be given to the groove's depth and width. A groove that is too shallow may not be effective, while one that is too deep may be difficult to clean thoroughly. A depth of approximately ½ inch is generally recommended, with a width proportionate to the overall size of the cutting board.

C. Handle Considerations (Optional):

While not strictly necessary, adding handles can significantly enhance the usability and portability of the cutting board. Handles can be incorporated into the design either as integral extensions of the board itself or as separately attached components. Consider the ergonomics of the handle placement to ensure comfortable and secure handling, even when the cutting board is wet or carrying heavy ingredients.

II. Construction Techniques: A Step-by-Step Guide

A. Preparing the Wood:

Once the wood has been selected, carefully measure and cut the pieces according to your design specifications. Ensure all surfaces are smooth and free of any imperfections. For hardwoods, a planer or jointer is highly recommended to achieve perfectly flat and square surfaces. Accurate measurements and precise cuts are fundamental to a successful project.

B. Creating the Juice Groove:

Several methods exist for creating the juice groove. One common approach involves using a router with a suitable bit to create a channel along the desired perimeter. A template may be helpful for ensuring uniform depth and width. Alternatively, a table saw with a dado stack can be used to create the groove. Precise cuts are crucial to achieve a clean, functional groove.

C. Assembling the Cutting Board:

The method of assembling the cutting board depends largely on the design. For a simple, single-piece board, the process is straightforward. For more complex designs, such as those involving multiple pieces or end-grain construction, precise joinery techniques are required. Wood glue and clamps are essential for securing the components. Consider using biscuits, dowels, or other joinery methods for added strength and stability.

D. Finishing the Cutting Board:

Proper finishing is crucial for both the longevity and safety of the cutting board. Multiple coats of food-safe mineral oil or cutting board oil should be applied, allowing each coat to thoroughly dry before applying the next. Avoid using varnishes, lacquers, or other finishes that may chip, crack, or leach harmful chemicals into food. The oiling process enhances the wood's natural beauty, providing a protective layer that resists moisture and bacterial growth. Regular re-oiling will help maintain the board's condition and extend its lifespan.

III. Safety and Maintenance: Ensuring Longevity and Hygiene

Food safety is paramount when using any cutting board. Always ensure the cutting board is thoroughly cleaned after each use with hot, soapy water. Avoid using abrasive cleaners or scouring pads, as these may damage the surface. Regularly inspect the cutting board for any signs of damage or wear. Replace the board if it becomes excessively worn or damaged.

Proper storage is also essential. Allow the cutting board to air dry completely after washing. Store it in a dry, well-ventilated area to prevent the growth of mold or mildew. Avoiding prolonged exposure to moisture will significantly extend its lifespan.

Regular maintenance is key to preserving the integrity and hygiene of the custom cutting board. Periodically re-oil the surface to maintain its protective layer and prevent cracking or dryness. Inspect the juice groove for any buildup of food particles or debris, and clean it thoroughly to maintain optimal hygiene.

IV. Conclusion: A Culinary Investment

Crafting a custom cutting board is a rewarding project that elevates the culinary experience. By carefully considering the design parameters, selecting appropriate materials, and meticulously following the construction steps, you can create a functional, aesthetically pleasing, and long-lasting piece that will serve as a testament to your craftsmanship and enhance your kitchen for years to come. The inclusion of a juice groove represents a significant enhancement in functionality, promoting both ease of use and superior hygiene. This detailed guide provides a comprehensive framework, allowing you to personalize your creation and tailor it to your specific preferences and culinary needs.

Custom Cutting Board Plans with Juice Groove for Easy Cleanup and Mess-Free Prep

Introduction: Elevating Culinary Functionality

The humble cutting board, a seemingly simple kitchen utensil, plays a pivotal role in culinary endeavors. Its functionality extends beyond merely providing a surface for chopping; it directly impacts food safety, efficiency, and the overall aesthetic of the kitchen environment. While commercially available cutting boards abound, crafting a custom cutting board offers unparalleled benefits, allowing for precise customization to meet individual needs and preferences. This comprehensive guide meticulously outlines the plans for constructing a superior cutting board, incorporating a crucial design element: a juice groove for effortless cleanup and mess-free food preparation.

I. Design Considerations: Tailoring the Cutting Board to Your Needs

A. Dimensions and Material Selection:

The dimensions of your custom cutting board should be dictated by the intended use and available counter space. Consider the size of typical items you prepare, ensuring adequate working area without compromising on portability. A standard size might range from 12" x 18" to 18" x 24", but larger or smaller dimensions can be easily adapted. Material selection significantly impacts durability, hygiene, and aesthetic appeal. Popular choices include:

  • Hardwood: Species like maple, cherry, walnut, and teak offer exceptional hardness, durability, and visual appeal. Hardwoods are naturally resistant to bacteria and offer superior longevity compared to softer woods. However, they are more expensive and require more meticulous finishing.
  • Softwood: Pine and fir are less expensive options, but they are softer and more prone to scratching and damage. Their porous nature also necessitates more rigorous sanitation practices. They are generally less suitable for heavy-duty use.
  • End Grain: Constructed from smaller pieces of wood arranged on their end, end-grain cutting boards offer unparalleled knife-friendliness and self-healing properties. The wood fibers are perpendicular to the cutting surface, minimizing damage to knife edges and reducing the risk of dulling. However, they are more complex to construct.
  • Synthetic Materials: Plastic and other synthetic materials are readily available, affordable, and easy to clean. However, they often lack the warmth and aesthetic appeal of wood and may not be as durable in the long run.

B. The Crucial Juice Groove: Design and Placement:

The incorporation of a juice groove is paramount to enhancing both functionality and hygiene. This groove, typically a recessed channel along the perimeter or a portion of the cutting board, effectively captures juices, oils, and other liquids that result from food preparation. This prevents spills, facilitates easy cleaning, and maintains a cleaner work surface. Careful consideration must be given to the groove's depth and width. A groove that is too shallow may not be effective, while one that is too deep may be difficult to clean thoroughly. A depth of approximately ½ inch is generally recommended, with a width proportionate to the overall size of the cutting board.

C. Handle Considerations (Optional):

While not strictly necessary, adding handles can significantly enhance the usability and portability of the cutting board. Handles can be incorporated into the design either as integral extensions of the board itself or as separately attached components. Consider the ergonomics of the handle placement to ensure comfortable and secure handling, even when the cutting board is wet or carrying heavy ingredients.

II. Construction Techniques: A Step-by-Step Guide

A. Preparing the Wood:

Once the wood has been selected, carefully measure and cut the pieces according to your design specifications. Ensure all surfaces are smooth and free of any imperfections. For hardwoods, a planer or jointer is highly recommended to achieve perfectly flat and square surfaces. Accurate measurements and precise cuts are fundamental to a successful project.

B. Creating the Juice Groove:

Several methods exist for creating the juice groove. One common approach involves using a router with a suitable bit to create a channel along the desired perimeter. A template may be helpful for ensuring uniform depth and width. Alternatively, a table saw with a dado stack can be used to create the groove. Precise cuts are crucial to achieve a clean, functional groove.

C. Assembling the Cutting Board:

The method of assembling the cutting board depends largely on the design. For a simple, single-piece board, the process is straightforward. For more complex designs, such as those involving multiple pieces or end-grain construction, precise joinery techniques are required. Wood glue and clamps are essential for securing the components. Consider using biscuits, dowels, or other joinery methods for added strength and stability.

D. Finishing the Cutting Board:

Proper finishing is crucial for both the longevity and safety of the cutting board. Multiple coats of food-safe mineral oil or cutting board oil should be applied, allowing each coat to thoroughly dry before applying the next. Avoid using varnishes, lacquers, or other finishes that may chip, crack, or leach harmful chemicals into food. The oiling process enhances the wood's natural beauty, providing a protective layer that resists moisture and bacterial growth. Regular re-oiling will help maintain the board's condition and extend its lifespan.

III. Safety and Maintenance: Ensuring Longevity and Hygiene

Food safety is paramount when using any cutting board. Always ensure the cutting board is thoroughly cleaned after each use with hot, soapy water. Avoid using abrasive cleaners or scouring pads, as these may damage the surface. Regularly inspect the cutting board for any signs of damage or wear. Replace the board if it becomes excessively worn or damaged.

Proper storage is also essential. Allow the cutting board to air dry completely after washing. Store it in a dry, well-ventilated area to prevent the growth of mold or mildew. Avoiding prolonged exposure to moisture will significantly extend its lifespan.

Regular maintenance is key to preserving the integrity and hygiene of the custom cutting board. Periodically re-oil the surface to maintain its protective layer and prevent cracking or dryness. Inspect the juice groove for any buildup of food particles or debris, and clean it thoroughly to maintain optimal hygiene.

IV. Conclusion: A Culinary Investment

Crafting a custom cutting board is a rewarding project that elevates the culinary experience. By carefully considering the design parameters, selecting appropriate materials, and meticulously following the construction steps, you can create a functional, aesthetically pleasing, and long-lasting piece that will serve as a testament to your craftsmanship and enhance your kitchen for years to come. The inclusion of a juice groove represents a significant enhancement in functionality, promoting both ease of use and superior hygiene. This detailed guide provides a comprehensive framework, allowing you to personalize your creation and tailor it to your specific preferences and culinary needs.

Let's Build a Cajon! A Step-by-Step Guide

Hey there, fellow music lovers! Ever wanted to build your own instrument? It's way more satisfying than you'd think, and today we're tackling the wonderfully percussive cajon. This isn't some rocket science project, I promise. With a little patience and the right tools, you'll be banging out rhythms in no time. So grab your tools, let's get started!

Gathering Your Supplies: The Cajon Shopping List

Before we dive into the construction, let's make sure you have everything you need. This list is for a standard-sized cajon, but you can adjust dimensions to your liking (just remember to adjust the internal bracing accordingly!).

The Wood: The Heart of Your Cajon

You'll need some sturdy wood. Plywood is a popular choice because it's readily available, relatively inexpensive, and strong enough for this project. Here's what you'll need:

  • One piece of 1/2" (12mm) thick plywood for the front panel (tapa): This is the soundboard, so choose a nice piece! The size will depend on your desired cajon size, typically around 12" x 12".
  • Two pieces of 1/2" (12mm) thick plywood for the sides: These should be roughly 19" x 12". Again, adjust based on your desired size.
  • One piece of 1/2" (12mm) thick plywood for the back: This will be about the same size as the sides.
  • One piece of 1/2" (12mm) thick plywood for the bottom: This will also be about the same size as the sides.

Don't be afraid to get creative with the wood type! Different woods will give you different tonal characteristics. Experiment to find what you like.

Tools of the Trade: Your Cajon Construction Crew

You'll need a few basic tools for this project. If you don't have them, see if a friend does, or consider borrowing them from a local hardware store.

  • Measuring Tape: Accuracy is key!
  • Pencil: For marking your cuts.
  • Circular Saw or Jigsaw: To cut the plywood.
  • Clamps: Lots of them! You'll need these to hold the pieces together while the glue dries.
  • Wood Glue: A strong wood glue is essential.
  • Screws: 1.5" or 2" wood screws, enough to secure all the pieces.
  • Drill: To pre-drill holes for the screws (this prevents the wood from splitting).
  • Sandpaper: Various grits for smoothing the edges and surfaces.
  • Safety Glasses: Protect your eyes!
  • Hearing Protection: Protect your ears!

Building Your Cajon: Let's Get Our Hands Dirty

Alright, let's build! Remember safety first! Always wear safety glasses and hearing protection.

Cutting the Wood: Precision is Key

This is where your measurements and cutting skills come in. Carefully measure and cut all your plywood pieces according to your chosen dimensions. Make sure your cuts are clean and square for the best results. A little extra care here will make the rest of the process easier.

Assembling the Box: Time to Glue and Clamp

Now for the fun part! Apply a generous bead of wood glue to the edges of your side pieces. Then, carefully position the bottom piece and one side piece, ensuring they form a right angle. Secure them firmly with clamps. Repeat this process for the other side piece and the back panel. Make sure everything is aligned perfectly, and leave it to dry completely according to the glue's instructions (usually at least 24 hours).

Adding Internal Bracing: Enhancing the Sound

Once the glue is dry, we need to add internal bracing to improve the cajon's resonance and sound. You can use scraps of the same plywood to create a simple X-shaped brace or a more complex system depending on your desired sound. Glue and screw these braces securely to the inside of the cajon box. The bracing helps avoid excessive vibrations and gives the sound more clarity.

Attaching the Front Panel (Tapa): The Final Touches

The front panel is what gives your cajon its unique sound. It's crucial to fit it snugly but not too tightly. You can either glue and screw the front panel to the cajon body or use some smaller wood blocks to create a little gap between the panel and the box for a more resonant sound. Experiment to find what works best for you. Be careful not to over-tighten the screws, which can crack the wood.

Sanding and Finishing: Making it Shine

Once everything is dry and secure, it's time to sand your cajon. Start with a coarser grit sandpaper and gradually move to finer grits to achieve a smooth finish. This is a crucial step for both aesthetics and to prevent splinters. Once sanded, you can finish your cajon with varnish, paint, or stain, depending on your preference. Let this dry completely.

Playing Your Homemade Cajon: Enjoy the Rhythm!

Congratulations! You've built your own cajon. Give it a try! You can experiment with different playing techniques â€" slapping the center for a bass sound, striking the edges for a higher pitch, or using your fingers for different tones. The beauty of a homemade cajon is that it's unique to you. Enjoy the rhythmic journey!

Commonly Asked Questions (FAQs)

Here are some questions people often ask about building cajons:

  • Q: What type of wood is best for a cajon? A: Plywood is a great starting point due to its affordability and strength. Birch and poplar are also popular choices.
  • Q: How thick should the plywood be? A: 1/2" (12mm) is generally recommended for a balance of strength and resonance.
  • Q: How important is the internal bracing? A: It's very important! It significantly impacts the cajon's sound, providing resonance and preventing unwanted vibrations. Experiment with different bracing patterns.
  • Q: Can I use nails instead of screws? A: It's generally better to use screws as they provide a stronger and more secure hold. Nails can loosen over time.
  • Q: How long does it take to build a cajon? A: Allow a few days, including drying time for the glue and finish. Don't rush the process!
  • Q: Can I customize the size of my cajon? A: Absolutely! Adjust the dimensions to your liking, but keep in mind that the size will affect the sound.
  • Q: What kind of finish should I use? A: Varnish, paint, or stain are all good options. Choose something that will protect the wood and enhance its appearance.

I hope this guide has been helpful. Happy building, and even happier playing!

Let's Build a Cajon! A Step-by-Step Guide

Hey there, fellow music lovers! Ever wanted to build your own instrument? It's way more satisfying than you'd think, and today we're tackling the wonderfully percussive cajon. This isn't some rocket science project, I promise. With a little patience and the right tools, you'll be banging out rhythms in no time. So grab your tools, let's get started!

Gathering Your Supplies: The Cajon Shopping List

Before we dive into the construction, let's make sure you have everything you need. This list is for a standard-sized cajon, but you can adjust dimensions to your liking (just remember to adjust the internal bracing accordingly!).

The Wood: The Heart of Your Cajon

You'll need some sturdy wood. Plywood is a popular choice because it's readily available, relatively inexpensive, and strong enough for this project. Here's what you'll need:

  • One piece of 1/2" (12mm) thick plywood for the front panel (tapa): This is the soundboard, so choose a nice piece! The size will depend on your desired cajon size, typically around 12" x 12".
  • Two pieces of 1/2" (12mm) thick plywood for the sides: These should be roughly 19" x 12". Again, adjust based on your desired size.
  • One piece of 1/2" (12mm) thick plywood for the back: This will be about the same size as the sides.
  • One piece of 1/2" (12mm) thick plywood for the bottom: This will also be about the same size as the sides.

Don't be afraid to get creative with the wood type! Different woods will give you different tonal characteristics. Experiment to find what you like.

Tools of the Trade: Your Cajon Construction Crew

You'll need a few basic tools for this project. If you don't have them, see if a friend does, or consider borrowing them from a local hardware store.

  • Measuring Tape: Accuracy is key!
  • Pencil: For marking your cuts.
  • Circular Saw or Jigsaw: To cut the plywood.
  • Clamps: Lots of them! You'll need these to hold the pieces together while the glue dries.
  • Wood Glue: A strong wood glue is essential.
  • Screws: 1.5" or 2" wood screws, enough to secure all the pieces.
  • Drill: To pre-drill holes for the screws (this prevents the wood from splitting).
  • Sandpaper: Various grits for smoothing the edges and surfaces.
  • Safety Glasses: Protect your eyes!
  • Hearing Protection: Protect your ears!

Building Your Cajon: Let's Get Our Hands Dirty

Alright, let's build! Remember safety first! Always wear safety glasses and hearing protection.

Cutting the Wood: Precision is Key

This is where your measurements and cutting skills come in. Carefully measure and cut all your plywood pieces according to your chosen dimensions. Make sure your cuts are clean and square for the best results. A little extra care here will make the rest of the process easier.

Assembling the Box: Time to Glue and Clamp

Now for the fun part! Apply a generous bead of wood glue to the edges of your side pieces. Then, carefully position the bottom piece and one side piece, ensuring they form a right angle. Secure them firmly with clamps. Repeat this process for the other side piece and the back panel. Make sure everything is aligned perfectly, and leave it to dry completely according to the glue's instructions (usually at least 24 hours).

Adding Internal Bracing: Enhancing the Sound

Once the glue is dry, we need to add internal bracing to improve the cajon's resonance and sound. You can use scraps of the same plywood to create a simple X-shaped brace or a more complex system depending on your desired sound. Glue and screw these braces securely to the inside of the cajon box. The bracing helps avoid excessive vibrations and gives the sound more clarity.

Attaching the Front Panel (Tapa): The Final Touches

The front panel is what gives your cajon its unique sound. It's crucial to fit it snugly but not too tightly. You can either glue and screw the front panel to the cajon body or use some smaller wood blocks to create a little gap between the panel and the box for a more resonant sound. Experiment to find what works best for you. Be careful not to over-tighten the screws, which can crack the wood.

Sanding and Finishing: Making it Shine

Once everything is dry and secure, it's time to sand your cajon. Start with a coarser grit sandpaper and gradually move to finer grits to achieve a smooth finish. This is a crucial step for both aesthetics and to prevent splinters. Once sanded, you can finish your cajon with varnish, paint, or stain, depending on your preference. Let this dry completely.

Playing Your Homemade Cajon: Enjoy the Rhythm!

Congratulations! You've built your own cajon. Give it a try! You can experiment with different playing techniques â€" slapping the center for a bass sound, striking the edges for a higher pitch, or using your fingers for different tones. The beauty of a homemade cajon is that it's unique to you. Enjoy the rhythmic journey!

Commonly Asked Questions (FAQs)

Here are some questions people often ask about building cajons:

  • Q: What type of wood is best for a cajon? A: Plywood is a great starting point due to its affordability and strength. Birch and poplar are also popular choices.
  • Q: How thick should the plywood be? A: 1/2" (12mm) is generally recommended for a balance of strength and resonance.
  • Q: How important is the internal bracing? A: It's very important! It significantly impacts the cajon's sound, providing resonance and preventing unwanted vibrations. Experiment with different bracing patterns.
  • Q: Can I use nails instead of screws? A: It's generally better to use screws as they provide a stronger and more secure hold. Nails can loosen over time.
  • Q: How long does it take to build a cajon? A: Allow a few days, including drying time for the glue and finish. Don't rush the process!
  • Q: Can I customize the size of my cajon? A: Absolutely! Adjust the dimensions to your liking, but keep in mind that the size will affect the sound.
  • Q: What kind of finish should I use? A: Varnish, paint, or stain are all good options. Choose something that will protect the wood and enhance its appearance.

I hope this guide has been helpful. Happy building, and even happier playing!

Wednesday, 20 November 2024

Start a Profitable Woodworking Business with These Ideas

Start a Profitable Woodworking Business with These Ideas

The allure of woodworking is undeniable. It's a craft that blends creativity, technical skill, and the satisfaction of creating something tangible and beautiful. For those with a passion for wood and an entrepreneurial spirit, turning this hobby into a profitable business is an achievable dream. This comprehensive guide will equip you with the necessary knowledge, tools, and ideas to launch your woodworking venture.

1. Identifying Your Niche: Finding Your Unique Selling Proposition

In the world of woodworking, differentiation is key. Identifying a specific niche will help you stand out from the competition and attract a targeted audience. Consider these areas:

1.1. Specializing in a Specific Wood Type

Focus on a particular wood known for its unique properties, aesthetics, or sustainability, such as reclaimed wood, exotic hardwoods, or locally sourced timber. This specialization will allow you to cater to discerning customers seeking a distinct look and feel.

1.2. Focusing on a Particular Style

Define your woodworking style. Are you drawn to rustic farmhouse designs, modern minimalism, or intricate Victorian details? Choosing a style will provide a consistent aesthetic for your creations, making them easily recognizable and attracting customers who appreciate your specific approach.

1.3. Offering Unique Products

Identify a gap in the market. Do you see a need for specific woodworking products? Perhaps you can create handcrafted toys, custom-designed furniture, or eco-friendly home décor items that cater to a particular demographic or lifestyle.

2. Developing Essential Skills: Mastering the Craft

While passion is a great starting point, woodworking demands a solid foundation of technical skills. Here's how to develop your expertise:

2.1. Hands-on Training and Workshops

Enroll in woodworking courses or workshops offered by local community colleges, artisan centers, or experienced woodworkers. Hands-on training will provide practical experience and guidance from professionals, ensuring you develop the necessary techniques and safety practices.

2.2. Online Resources and Tutorials

The internet is a treasure trove of woodworking knowledge. Utilize online platforms like YouTube, Skillshare, and woodworking forums to access a vast library of tutorials, project plans, and expert advice.

2.3. Practice and Experimentation

Practice makes perfect. Work on personal projects, experiment with different techniques and wood types, and continuously refine your skills. The more you practice, the more confident and proficient you'll become.

3. Building a Solid Foundation: Creating a Business Plan

A well-structured business plan is essential for guiding your woodworking venture toward success. It outlines your business strategy, financial projections, and marketing plan.

3.1. Defining Your Target Market

Who are your ideal customers? Understanding your target audience is crucial for tailoring your products and marketing efforts. Research demographics, preferences, and spending habits to pinpoint the most receptive market for your woodworking creations.

3.2. Developing a Pricing Strategy

Pricing is a delicate balance between profitability and customer affordability. Research market rates for comparable woodworking products, consider your material costs, labor time, and overhead expenses, and set prices that are both competitive and sustainable.

3.3. Marketing and Sales Strategies

How will you reach your target market? Craft a comprehensive marketing plan that includes online strategies (website, social media, online marketplaces), local events and markets (craft fairs, farmers' markets), and networking with interior designers, home builders, and retailers.

4. Investing in Essential Equipment and Tools

Woodworking demands a range of tools and equipment. Start with the essentials, and gradually expand your arsenal as your business grows.

4.1. Essential Hand Tools

A basic set of hand tools should include:

  • Hammers
  • Screwdrivers
  • Pliers
  • Wrenches
  • Measuring tapes
  • Levels
  • Chisels
  • Planes
  • Saws

4.2. Power Tools

As your woodworking skills advance, invest in power tools for increased efficiency and precision. Some key power tools include:

  • Jigsaw
  • Circular saw
  • Belt sander
  • Router
  • Table saw
  • Drill press

4.3. Safety Equipment

Woodworking can be hazardous. Prioritize safety by investing in:

  • Safety glasses
  • Hearing protection
  • Dust mask
  • Work gloves

5. Creating a Professional Workspace

A dedicated workspace is crucial for woodworking. Consider these factors:

5.1. Adequate Space and Lighting

Ensure sufficient space for your woodworking activities, with ample room to move around and handle large pieces of wood. Good lighting is essential for accuracy and visibility.

5.2. Dust Collection System

Woodworking generates dust, which can be harmful to your health and damage your equipment. Invest in a dust collection system, such as a dust collector or a shop vacuum, to control dust levels and maintain a clean workspace.

5.3. Storage Solutions

Organize your tools and materials effectively. Utilize shelving, cabinets, and toolboxes to keep your workspace neat and efficient.

6. Promoting Your Woodworking Business

Marketing is essential for attracting customers. Here are some strategies to promote your woodworking business:

6.1. Creating a Professional Website

A website is your digital storefront. Present your woodworking skills, showcase your creations, and provide information about your services, prices, and contact details. Consider using online platforms like Wix, Squarespace, or Shopify to create a visually appealing and user-friendly website.

6.2. Engaging on Social Media

Utilize social media platforms like Instagram, Facebook, and Pinterest to connect with potential customers. Share high-quality photographs of your work, behind-the-scenes glimpses of your craft, and updates on your latest creations.

6.3. Participating in Local Events

Network with potential customers at craft fairs, farmers' markets, and local community events. Bring samples of your work, offer demonstrations, and engage with attendees to build relationships and generate leads.

7. Staying Ahead of the Curve: Continuous Learning and Innovation

Woodworking is a constantly evolving field. To stay relevant and competitive, embrace continuous learning and innovation.

7.1. Exploring New Techniques and Tools

Stay updated on the latest woodworking techniques, tools, and materials. Attend workshops, read industry publications, and experiment with new approaches to expand your skillset and stay ahead of the curve.

7.2. Responding to Market Trends

Monitor market trends, customer preferences, and design aesthetics to ensure your woodworking creations remain in demand. Adapt your offerings to meet emerging trends and stay relevant in the ever-changing landscape of woodworking.

7.3. Building a Strong Brand Identity

Develop a unique brand identity that reflects your woodworking style, values, and target audience. Create a memorable logo, consistent visual imagery, and a clear brand message that resonates with your ideal customers.

Starting a woodworking business is a rewarding journey that requires dedication, passion, and a willingness to learn. By carefully planning, developing your skills, and embracing the opportunities offered by the ever-evolving world of woodworking, you can turn your love of wood into a thriving and profitable venture.

Start a Profitable Woodworking Business with These Ideas

Start a Profitable Woodworking Business with These Ideas

The allure of woodworking is undeniable. It's a craft that blends creativity, technical skill, and the satisfaction of creating something tangible and beautiful. For those with a passion for wood and an entrepreneurial spirit, turning this hobby into a profitable business is an achievable dream. This comprehensive guide will equip you with the necessary knowledge, tools, and ideas to launch your woodworking venture.

1. Identifying Your Niche: Finding Your Unique Selling Proposition

In the world of woodworking, differentiation is key. Identifying a specific niche will help you stand out from the competition and attract a targeted audience. Consider these areas:

1.1. Specializing in a Specific Wood Type

Focus on a particular wood known for its unique properties, aesthetics, or sustainability, such as reclaimed wood, exotic hardwoods, or locally sourced timber. This specialization will allow you to cater to discerning customers seeking a distinct look and feel.

1.2. Focusing on a Particular Style

Define your woodworking style. Are you drawn to rustic farmhouse designs, modern minimalism, or intricate Victorian details? Choosing a style will provide a consistent aesthetic for your creations, making them easily recognizable and attracting customers who appreciate your specific approach.

1.3. Offering Unique Products

Identify a gap in the market. Do you see a need for specific woodworking products? Perhaps you can create handcrafted toys, custom-designed furniture, or eco-friendly home décor items that cater to a particular demographic or lifestyle.

2. Developing Essential Skills: Mastering the Craft

While passion is a great starting point, woodworking demands a solid foundation of technical skills. Here's how to develop your expertise:

2.1. Hands-on Training and Workshops

Enroll in woodworking courses or workshops offered by local community colleges, artisan centers, or experienced woodworkers. Hands-on training will provide practical experience and guidance from professionals, ensuring you develop the necessary techniques and safety practices.

2.2. Online Resources and Tutorials

The internet is a treasure trove of woodworking knowledge. Utilize online platforms like YouTube, Skillshare, and woodworking forums to access a vast library of tutorials, project plans, and expert advice.

2.3. Practice and Experimentation

Practice makes perfect. Work on personal projects, experiment with different techniques and wood types, and continuously refine your skills. The more you practice, the more confident and proficient you'll become.

3. Building a Solid Foundation: Creating a Business Plan

A well-structured business plan is essential for guiding your woodworking venture toward success. It outlines your business strategy, financial projections, and marketing plan.

3.1. Defining Your Target Market

Who are your ideal customers? Understanding your target audience is crucial for tailoring your products and marketing efforts. Research demographics, preferences, and spending habits to pinpoint the most receptive market for your woodworking creations.

3.2. Developing a Pricing Strategy

Pricing is a delicate balance between profitability and customer affordability. Research market rates for comparable woodworking products, consider your material costs, labor time, and overhead expenses, and set prices that are both competitive and sustainable.

3.3. Marketing and Sales Strategies

How will you reach your target market? Craft a comprehensive marketing plan that includes online strategies (website, social media, online marketplaces), local events and markets (craft fairs, farmers' markets), and networking with interior designers, home builders, and retailers.

4. Investing in Essential Equipment and Tools

Woodworking demands a range of tools and equipment. Start with the essentials, and gradually expand your arsenal as your business grows.

4.1. Essential Hand Tools

A basic set of hand tools should include:

  • Hammers
  • Screwdrivers
  • Pliers
  • Wrenches
  • Measuring tapes
  • Levels
  • Chisels
  • Planes
  • Saws

4.2. Power Tools

As your woodworking skills advance, invest in power tools for increased efficiency and precision. Some key power tools include:

  • Jigsaw
  • Circular saw
  • Belt sander
  • Router
  • Table saw
  • Drill press

4.3. Safety Equipment

Woodworking can be hazardous. Prioritize safety by investing in:

  • Safety glasses
  • Hearing protection
  • Dust mask
  • Work gloves

5. Creating a Professional Workspace

A dedicated workspace is crucial for woodworking. Consider these factors:

5.1. Adequate Space and Lighting

Ensure sufficient space for your woodworking activities, with ample room to move around and handle large pieces of wood. Good lighting is essential for accuracy and visibility.

5.2. Dust Collection System

Woodworking generates dust, which can be harmful to your health and damage your equipment. Invest in a dust collection system, such as a dust collector or a shop vacuum, to control dust levels and maintain a clean workspace.

5.3. Storage Solutions

Organize your tools and materials effectively. Utilize shelving, cabinets, and toolboxes to keep your workspace neat and efficient.

6. Promoting Your Woodworking Business

Marketing is essential for attracting customers. Here are some strategies to promote your woodworking business:

6.1. Creating a Professional Website

A website is your digital storefront. Present your woodworking skills, showcase your creations, and provide information about your services, prices, and contact details. Consider using online platforms like Wix, Squarespace, or Shopify to create a visually appealing and user-friendly website.

6.2. Engaging on Social Media

Utilize social media platforms like Instagram, Facebook, and Pinterest to connect with potential customers. Share high-quality photographs of your work, behind-the-scenes glimpses of your craft, and updates on your latest creations.

6.3. Participating in Local Events

Network with potential customers at craft fairs, farmers' markets, and local community events. Bring samples of your work, offer demonstrations, and engage with attendees to build relationships and generate leads.

7. Staying Ahead of the Curve: Continuous Learning and Innovation

Woodworking is a constantly evolving field. To stay relevant and competitive, embrace continuous learning and innovation.

7.1. Exploring New Techniques and Tools

Stay updated on the latest woodworking techniques, tools, and materials. Attend workshops, read industry publications, and experiment with new approaches to expand your skillset and stay ahead of the curve.

7.2. Responding to Market Trends

Monitor market trends, customer preferences, and design aesthetics to ensure your woodworking creations remain in demand. Adapt your offerings to meet emerging trends and stay relevant in the ever-changing landscape of woodworking.

7.3. Building a Strong Brand Identity

Develop a unique brand identity that reflects your woodworking style, values, and target audience. Create a memorable logo, consistent visual imagery, and a clear brand message that resonates with your ideal customers.

Starting a woodworking business is a rewarding journey that requires dedication, passion, and a willingness to learn. By carefully planning, developing your skills, and embracing the opportunities offered by the ever-evolving world of woodworking, you can turn your love of wood into a thriving and profitable venture.

Tuesday, 19 November 2024

How to Build a Wall-Mounted Wooden Shoe Rack for Small Spaces

Building a Wall-Mounted Wooden Shoe Rack for Small Spaces

Tired of tripping over shoes in your entryway? A wall-mounted shoe rack is a space-saving solution perfect for small spaces. This article guides you through building a simple, stylish shoe rack from wood, maximizing your storage and minimizing clutter. Get ready to create a tidy and organized entryway with this easy-to-follow guide.

Gather Your Materials

Before you begin, gather the necessary materials for your shoe rack:

  • Wood boards (choose a sturdy wood like pine or oak)
  • Screws
  • Wood glue
  • Wood stain or paint (optional)
  • Sandpaper
  • Measuring tape
  • Saw (hand saw or circular saw)
  • Drill
  • Level
  • Pencil

Determine Dimensions and Cut Wood

Measure the width and height of the area where you plan to install the shoe rack. Decide on the desired depth of your rack. Based on these measurements, use your saw to cut the wood boards to the appropriate size. For a typical shoe rack, you'll likely need:

  • Two side boards: These will be the vertical supports of your rack.
  • Multiple horizontal boards: These will create the shelves for your shoes.
  • Optional top board: This can add a decorative touch to the rack.

Assemble the Shoe Rack

Now, let's bring the shoe rack to life:

Create the Shelves

Start by assembling the shelves. Use wood glue to attach the horizontal boards to the side boards. Clamp the pieces together until the glue dries for a sturdy bond. Repeat this process for each shelf.

Attach Top Board (Optional)

If you're using a top board, glue and clamp it to the top of the side boards after the shelves are secure.

Finish and Sand

Once the glue dries, use sandpaper to smooth the edges and surfaces of the shoe rack. This will create a professional finish and prevent splinters. If desired, stain or paint the wood to enhance the appearance and match your décor.

Mount the Shoe Rack

Find a suitable location on your wall for your shoe rack. Using a level, mark the placement for the screws. Pre-drill pilot holes with the drill to prevent splitting the wood. Secure the shoe rack to the wall using screws. Make sure the screws are long enough to reach into wall studs for a secure hold.

Enjoy Your New Shoe Rack

Congratulations! You've successfully built a functional and stylish shoe rack. Now enjoy a clutter-free entryway with your new shoe storage solution.

How to Build a Wall-Mounted Wooden Shoe Rack for Small Spaces

Building a Wall-Mounted Wooden Shoe Rack for Small Spaces

Tired of tripping over shoes in your entryway? A wall-mounted shoe rack is a space-saving solution perfect for small spaces. This article guides you through building a simple, stylish shoe rack from wood, maximizing your storage and minimizing clutter. Get ready to create a tidy and organized entryway with this easy-to-follow guide.

Gather Your Materials

Before you begin, gather the necessary materials for your shoe rack:

  • Wood boards (choose a sturdy wood like pine or oak)
  • Screws
  • Wood glue
  • Wood stain or paint (optional)
  • Sandpaper
  • Measuring tape
  • Saw (hand saw or circular saw)
  • Drill
  • Level
  • Pencil

Determine Dimensions and Cut Wood

Measure the width and height of the area where you plan to install the shoe rack. Decide on the desired depth of your rack. Based on these measurements, use your saw to cut the wood boards to the appropriate size. For a typical shoe rack, you'll likely need:

  • Two side boards: These will be the vertical supports of your rack.
  • Multiple horizontal boards: These will create the shelves for your shoes.
  • Optional top board: This can add a decorative touch to the rack.

Assemble the Shoe Rack

Now, let's bring the shoe rack to life:

Create the Shelves

Start by assembling the shelves. Use wood glue to attach the horizontal boards to the side boards. Clamp the pieces together until the glue dries for a sturdy bond. Repeat this process for each shelf.

Attach Top Board (Optional)

If you're using a top board, glue and clamp it to the top of the side boards after the shelves are secure.

Finish and Sand

Once the glue dries, use sandpaper to smooth the edges and surfaces of the shoe rack. This will create a professional finish and prevent splinters. If desired, stain or paint the wood to enhance the appearance and match your décor.

Mount the Shoe Rack

Find a suitable location on your wall for your shoe rack. Using a level, mark the placement for the screws. Pre-drill pilot holes with the drill to prevent splitting the wood. Secure the shoe rack to the wall using screws. Make sure the screws are long enough to reach into wall studs for a secure hold.

Enjoy Your New Shoe Rack

Congratulations! You've successfully built a functional and stylish shoe rack. Now enjoy a clutter-free entryway with your new shoe storage solution.

Monday, 18 November 2024

Best Woodworking Items to Sell on Etsy and Online

Best Woodworking Items to Sell on Etsy and Online

Hey there, fellow woodworkers! You've got the skills, you've got the passion, and now you're ready to take your craft to the next level. But with so many options out there, what are the best woodworking items to sell online? Let's dive into some ideas that are sure to resonate with buyers.

Furniture

Let's face it, everyone loves a good piece of furniture. And when it comes to woodworking, furniture is a natural fit! From cozy coffee tables and rustic farmhouse benches to elegant dining sets and modern minimalist shelves, the possibilities are endless.
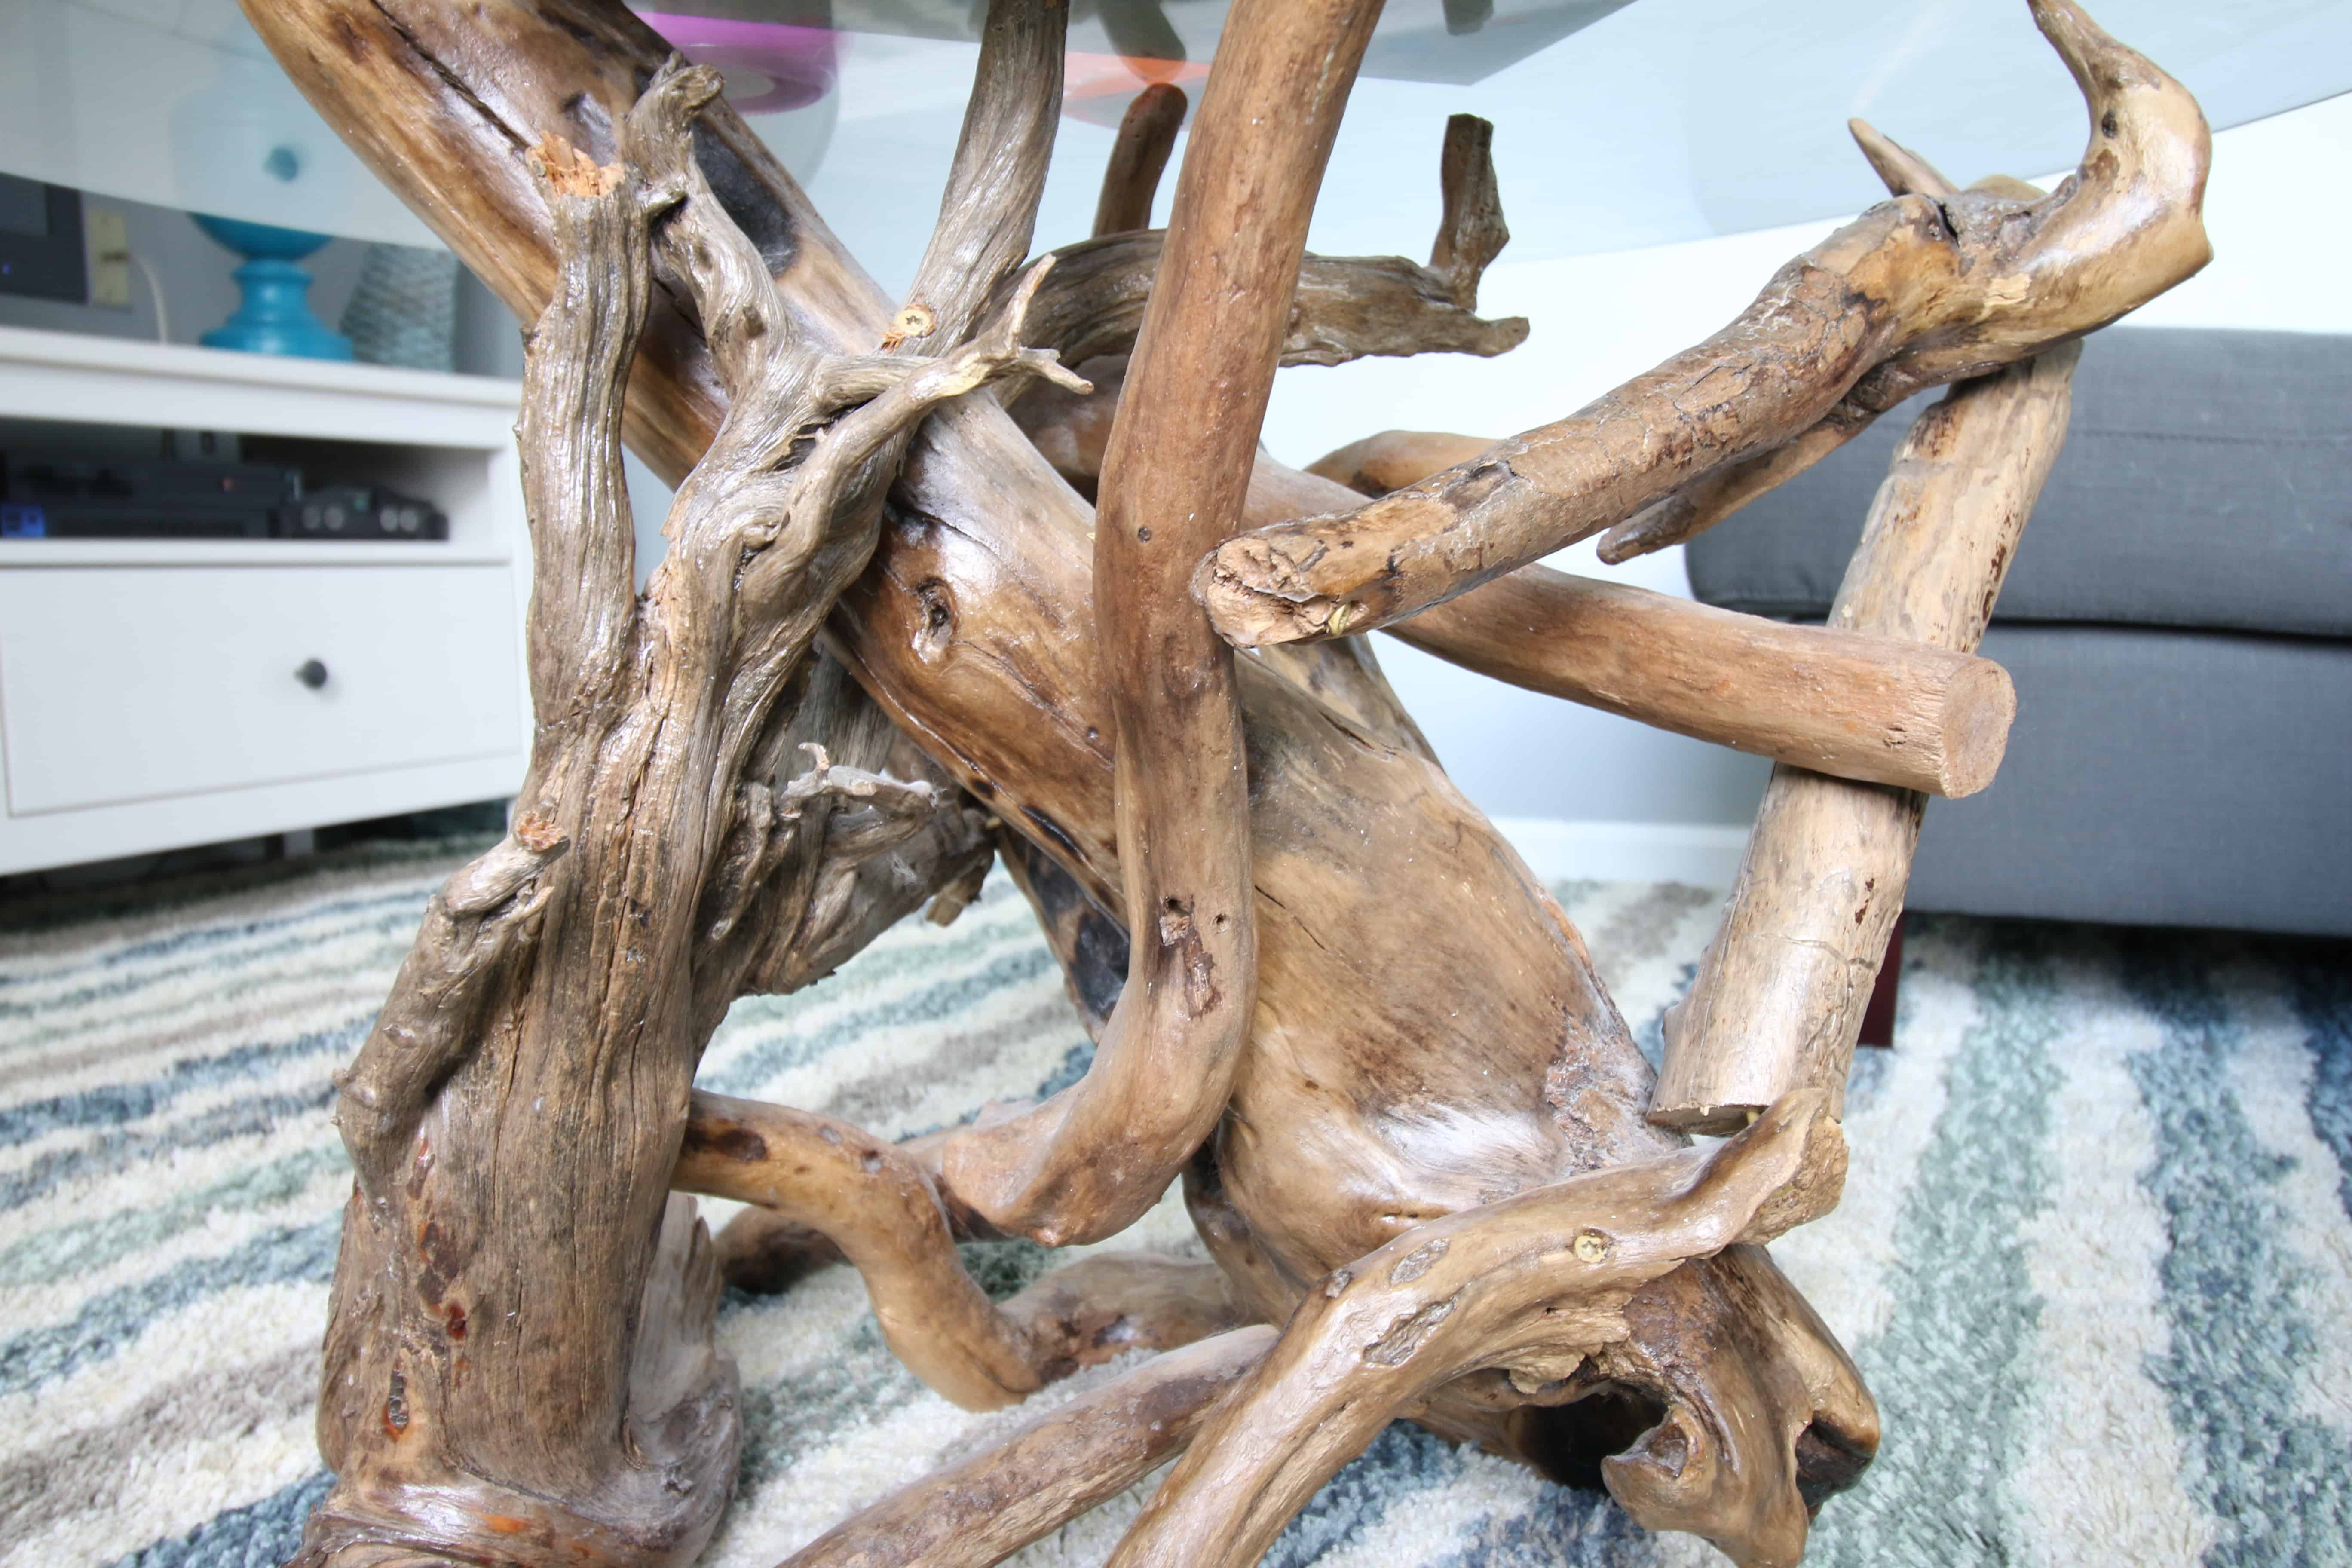
What's hot in furniture right now?

  • Mid-Century Modern: This timeless style is always in demand, with its clean lines, tapered legs, and warm wood tones. Think sleek sideboards, coffee tables, and end tables.
  • Industrial Chic: Embrace the raw beauty of metal and wood with industrial-style furniture. Think sturdy workbenches, reclaimed wood shelves, and metal-framed chairs.
  • Rustic Farmhouse: Bring a touch of country charm with farmhouse-style furniture. Think sturdy dining tables, farmhouse benches, and rustic coffee tables.

Home Decor

Beyond furniture, there's a whole world of home decor just waiting to be crafted. And you know what's great? Wood is such a versatile material, so you can create a wide range of pieces that add warmth and character to any space.

Popular Home Decor Items

  • Wall Art: Wooden signs, framed prints, and decorative wall panels are always a hit. Get creative with your designs, incorporating quotes, patterns, and even personalized elements.
  • Sculptures: Show off your artistic side with unique wooden sculptures. Abstract pieces, animal figures, and even whimsical creations can all add a touch of personality to a space.
  • Candle Holders: Simple yet stylish, wooden candle holders are a must-have for creating ambiance. Get creative with shapes, sizes, and finishes to add a touch of elegance.
  • Wooden Trays: These versatile pieces can be used for serving, organizing, or simply adding a touch of rustic charm to a coffee table or dresser.

Kitchen & Dining

Who doesn't love a beautiful, functional kitchen? Wooden kitchenware and dining accessories are a perfect way to add a touch of warmth and style to this central space.

Kitchen & Dining Ideas

  • Cutting Boards: From simple rectangular boards to intricate designs with handles, cutting boards are a must-have for any kitchen. Offer a variety of wood types and finishes, and consider adding personalized engravings.
  • Serving Trays: These can be used for everything from appetizers to desserts. Consider creating trays with handles for easy carrying.
  • Wooden Utensil Holders: Organize kitchen tools in style with a handcrafted utensil holder. Get creative with shapes and designs.
  • Wine Racks: For wine enthusiasts, wooden wine racks are a great addition to a dining room or kitchen. Offer different sizes and styles to suit various needs.

Personalized Items

There's something special about personalized gifts that makes them extra meaningful. Tap into this trend by offering custom-made woodworking pieces that customers can cherish for years to come.

Personalized Gift Ideas

  • Engraved Wooden Boxes: These are perfect for storing jewelry, keepsakes, or even special gifts. Offer a variety of sizes and engraving options to make each box unique.
  • Custom Wooden Signs: Create personalized signs for home, office, or even special events. Get creative with fonts, designs, and even incorporating meaningful quotes.
  • Personalized Cutting Boards: Add a special touch to a cutting board with an engraved name or message.
  • Wooden Photo Frames: Create unique photo frames with intricate designs and personalize them with names or special dates.

Outdoor Items

Bring your woodworking skills outdoors! There's a growing demand for durable, stylish, and eco-friendly outdoor furniture and decor.

Outdoor Woodworking Ideas

  • Planters: Create beautiful wooden planters to enhance gardens and outdoor spaces. Experiment with different sizes, shapes, and styles.
  • Birdhouses: These charming little structures are a great way to attract birds to your yard. Offer a variety of designs and styles, from rustic to modern.
  • Outdoor Furniture: From simple garden benches to elaborate picnic tables, outdoor furniture can add a touch of elegance to any patio or deck. Consider using weather-resistant woods like cedar or teak.
  • Outdoor Decor: Add a touch of rustic charm with wooden signs, bird feeders, or even decorative wind chimes.

Tips for Selling Woodworking Items Online

Now that you've got some fantastic ideas for woodworking items to sell, let's talk about how to make them a success online.

  • High-Quality Photos: First impressions matter. Invest in professional-quality photos that showcase your work in its best light.
  • Detailed Descriptions: Provide clear and concise descriptions of your products, including materials, dimensions, care instructions, and any customization options.
  • Competitive Pricing: Research your competitors to ensure your pricing is competitive but also reflects the quality of your work.
  • Excellent Customer Service: Respond to inquiries promptly, address any concerns quickly, and go the extra mile to ensure customer satisfaction.
  • Marketing & Promotion: Promote your Etsy shop and online store through social media, online advertising, and collaborations with other makers.

Commonly Asked Questions

Let's address some common questions about selling woodworking items online:

What are the best online marketplaces for selling woodworking items?

Etsy, Amazon Handmade, and Facebook Marketplace are all great options for selling handcrafted woodworking items.

What types of wood are best for selling online?

Popular choices include walnut, cherry, maple, oak, and pine. Consider the durability, appearance, and price of each wood type.

How can I ensure the quality of my woodworking items?

Use high-quality tools, materials, and techniques. Inspect your work carefully before shipping, and be sure to provide care instructions.

How can I make my woodworking business stand out online?

Offer unique designs, personalize items, and provide excellent customer service. Build a strong brand presence online with consistent branding and high-quality photos.

There you have it! Now you're armed with the knowledge and inspiration to create woodworking masterpieces that will sell like hotcakes online. So, grab your tools, unleash your creativity, and get ready to turn your passion into a successful woodworking business!

Best Woodworking Items to Sell on Etsy and Online

Best Woodworking Items to Sell on Etsy and Online

Hey there, fellow woodworkers! You've got the skills, you've got the passion, and now you're ready to take your craft to the next level. But with so many options out there, what are the best woodworking items to sell online? Let's dive into some ideas that are sure to resonate with buyers.

Furniture

Let's face it, everyone loves a good piece of furniture. And when it comes to woodworking, furniture is a natural fit! From cozy coffee tables and rustic farmhouse benches to elegant dining sets and modern minimalist shelves, the possibilities are endless.

What's hot in furniture right now?

  • Mid-Century Modern: This timeless style is always in demand, with its clean lines, tapered legs, and warm wood tones. Think sleek sideboards, coffee tables, and end tables.
  • Industrial Chic: Embrace the raw beauty of metal and wood with industrial-style furniture. Think sturdy workbenches, reclaimed wood shelves, and metal-framed chairs.
  • Rustic Farmhouse: Bring a touch of country charm with farmhouse-style furniture. Think sturdy dining tables, farmhouse benches, and rustic coffee tables.

Home Decor

Beyond furniture, there's a whole world of home decor just waiting to be crafted. And you know what's great? Wood is such a versatile material, so you can create a wide range of pieces that add warmth and character to any space.

Popular Home Decor Items

  • Wall Art: Wooden signs, framed prints, and decorative wall panels are always a hit. Get creative with your designs, incorporating quotes, patterns, and even personalized elements.
  • Sculptures: Show off your artistic side with unique wooden sculptures. Abstract pieces, animal figures, and even whimsical creations can all add a touch of personality to a space.
  • Candle Holders: Simple yet stylish, wooden candle holders are a must-have for creating ambiance. Get creative with shapes, sizes, and finishes to add a touch of elegance.
  • Wooden Trays: These versatile pieces can be used for serving, organizing, or simply adding a touch of rustic charm to a coffee table or dresser.

Kitchen & Dining

Who doesn't love a beautiful, functional kitchen? Wooden kitchenware and dining accessories are a perfect way to add a touch of warmth and style to this central space.

Kitchen & Dining Ideas

  • Cutting Boards: From simple rectangular boards to intricate designs with handles, cutting boards are a must-have for any kitchen. Offer a variety of wood types and finishes, and consider adding personalized engravings.
  • Serving Trays: These can be used for everything from appetizers to desserts. Consider creating trays with handles for easy carrying.
  • Wooden Utensil Holders: Organize kitchen tools in style with a handcrafted utensil holder. Get creative with shapes and designs.
  • Wine Racks: For wine enthusiasts, wooden wine racks are a great addition to a dining room or kitchen. Offer different sizes and styles to suit various needs.

Personalized Items

There's something special about personalized gifts that makes them extra meaningful. Tap into this trend by offering custom-made woodworking pieces that customers can cherish for years to come.

Personalized Gift Ideas

  • Engraved Wooden Boxes: These are perfect for storing jewelry, keepsakes, or even special gifts. Offer a variety of sizes and engraving options to make each box unique.
  • Custom Wooden Signs: Create personalized signs for home, office, or even special events. Get creative with fonts, designs, and even incorporating meaningful quotes.
  • Personalized Cutting Boards: Add a special touch to a cutting board with an engraved name or message.
  • Wooden Photo Frames: Create unique photo frames with intricate designs and personalize them with names or special dates.

Outdoor Items

Bring your woodworking skills outdoors! There's a growing demand for durable, stylish, and eco-friendly outdoor furniture and decor.

Outdoor Woodworking Ideas

  • Planters: Create beautiful wooden planters to enhance gardens and outdoor spaces. Experiment with different sizes, shapes, and styles.
  • Birdhouses: These charming little structures are a great way to attract birds to your yard. Offer a variety of designs and styles, from rustic to modern.
  • Outdoor Furniture: From simple garden benches to elaborate picnic tables, outdoor furniture can add a touch of elegance to any patio or deck. Consider using weather-resistant woods like cedar or teak.
  • Outdoor Decor: Add a touch of rustic charm with wooden signs, bird feeders, or even decorative wind chimes.

Tips for Selling Woodworking Items Online

Now that you've got some fantastic ideas for woodworking items to sell, let's talk about how to make them a success online.

  • High-Quality Photos: First impressions matter. Invest in professional-quality photos that showcase your work in its best light.
  • Detailed Descriptions: Provide clear and concise descriptions of your products, including materials, dimensions, care instructions, and any customization options.
  • Competitive Pricing: Research your competitors to ensure your pricing is competitive but also reflects the quality of your work.
  • Excellent Customer Service: Respond to inquiries promptly, address any concerns quickly, and go the extra mile to ensure customer satisfaction.
  • Marketing & Promotion: Promote your Etsy shop and online store through social media, online advertising, and collaborations with other makers.

Commonly Asked Questions

Let's address some common questions about selling woodworking items online:

What are the best online marketplaces for selling woodworking items?

Etsy, Amazon Handmade, and Facebook Marketplace are all great options for selling handcrafted woodworking items.

What types of wood are best for selling online?

Popular choices include walnut, cherry, maple, oak, and pine. Consider the durability, appearance, and price of each wood type.

How can I ensure the quality of my woodworking items?

Use high-quality tools, materials, and techniques. Inspect your work carefully before shipping, and be sure to provide care instructions.

How can I make my woodworking business stand out online?

Offer unique designs, personalize items, and provide excellent customer service. Build a strong brand presence online with consistent branding and high-quality photos.

There you have it! Now you're armed with the knowledge and inspiration to create woodworking masterpieces that will sell like hotcakes online. So, grab your tools, unleash your creativity, and get ready to turn your passion into a successful woodworking business!

Thursday, 7 November 2024

How to craft a magic box with wood: plans included

Alright, fellow adventurers! Are you ready to dive into the world of magical woodworking? We're going to build a magic box, a vessel for wonder, a place to hold secrets and dreams. No, I'm not talking about some cheap, plastic trick box from the dollar store. We're crafting something special, something that whispers of ancient enchantments and promises hidden potential.

But before we start hammering and sawing, let's talk about the magic. This box isn't about sleight of hand or cheap illusions. We're going to imbue it with real power, the kind that comes from intention and craftsmanship. Think of it like this: the box is a conduit, a vessel that channels your energy and focus. The wood itself, with its unique history and personality, will amplify your intent.

Now, let's get practical. This isn't about following some rigid set of instructions. It's about taking a journey, finding your own path, and bringing your unique vision to life. Think of these plans as a guide, a map to help you navigate the woods of creativity. Ready to begin? Let's go!

Materials:

Wood: Choose your wood carefully! Different woods have different energies. Oak is strong and protective, while cedar is calming and grounding. Pine is playful and inspiring, while walnut is elegant and sophisticated. Go with your gut. What kind of magic do you want to infuse into your box?
Tools: A basic woodworking toolkit will do: saw, hammer, drill, sandpaper, clamps, and measuring tape. You might also need a chisel and a router if you want to get fancy.
Hardware: You'll need hinges, a latch, and maybe some decorative nails. Choose them based on the style of your box and the magic you want to create.
Finishing Touches: Think about how you want your box to look. Will you stain it, paint it, or leave it natural? Do you want to add carvings, inlays, or other embellishments?

Step 1: The Foundation

The Design: First, you need to visualize the shape of your magic box. Do you want it to be square, round, or something else entirely? Will it be a simple box or have intricate details? Sketch out your ideas on paper.
Cutting the Pieces: Based on your design, carefully measure and cut the wood for your box. Use a saw or a router to create the exact shapes you need. This is where precision is key, so take your time and measure twice.

Step 2: Assembling the Box

Joining the Pieces: You can use various methods to join the pieces of wood, like dovetail joints, mortise and tenon joints, or simple glue and nails. Again, choose what feels right for your box and the type of magic you're trying to create.
Reinforcing the Structure: If you want your box to be extra strong, you can add internal braces or a reinforcing frame. Remember, this box will be a vessel for your magic, so make sure it can stand the test of time.

Step 3: Adding the Details

Hinges and Latch: Once the box is assembled, attach the hinges and latch. Choose hinges that complement the style of your box and use a drill to make pilot holes before screwing them in.
Decorative Elements: Now it's time to add your personal touch! This is where you can really make your box unique. You can carve designs into the wood, add inlays, or even paint it with special symbols or runes that hold particular meaning for you.

Step 4: Infusing the Magic

Intention and Ritual: Now that your box is complete, it's time to infuse it with your magic. Find a quiet place where you can focus without distractions. Hold the box in your hands and visualize the magic you want to create. What do you want this box to hold? What power do you want it to possess?
Crystal and Herbs: You can place crystals or herbs inside the box to amplify your intentions. For example, amethyst can help with intuition and clarity, while rose quartz can promote love and compassion. Rosemary can enhance memory, while lavender can calm the mind. Choose what resonates with you.
Words of Power: Speak your intentions out loud as you hold the box. Create a mantra or a poem that encapsulates your wishes. Your words are powerful and will infuse the box with your energy.

Step 5: Use and Care

Your Magic Box: Your magic box is now ready! Use it as a place to store your most precious treasures, write your dreams, or focus your intentions. Every time you open it, remember the magic you poured into its creation.
Cleaning and Maintenance: To preserve the magic of your box, clean it with a soft cloth and keep it in a safe place. The wood needs time to breathe, so avoid storing it in airtight containers.

This is just a starting point for your magical woodworking journey. There are endless possibilities, and the best magic comes from your own imagination. Remember, the power is within you. Go forth and craft a magic box that will hold your dreams and amplify your spirit. And when you're done, be sure to share your creations with the world! We all need a little magic in our lives.

How to craft a magic box with wood: plans included

Alright, fellow adventurers! Are you ready to dive into the world of magical woodworking? We're going to build a magic box, a vessel for wonder, a place to hold secrets and dreams. No, I'm not talking about some cheap, plastic trick box from the dollar store. We're crafting something special, something that whispers of ancient enchantments and promises hidden potential.

But before we start hammering and sawing, let's talk about the magic. This box isn't about sleight of hand or cheap illusions. We're going to imbue it with real power, the kind that comes from intention and craftsmanship. Think of it like this: the box is a conduit, a vessel that channels your energy and focus. The wood itself, with its unique history and personality, will amplify your intent.

Now, let's get practical. This isn't about following some rigid set of instructions. It's about taking a journey, finding your own path, and bringing your unique vision to life. Think of these plans as a guide, a map to help you navigate the woods of creativity. Ready to begin? Let's go!

Materials:

Wood: Choose your wood carefully! Different woods have different energies. Oak is strong and protective, while cedar is calming and grounding. Pine is playful and inspiring, while walnut is elegant and sophisticated. Go with your gut. What kind of magic do you want to infuse into your box?
Tools: A basic woodworking toolkit will do: saw, hammer, drill, sandpaper, clamps, and measuring tape. You might also need a chisel and a router if you want to get fancy.
Hardware: You'll need hinges, a latch, and maybe some decorative nails. Choose them based on the style of your box and the magic you want to create.
Finishing Touches: Think about how you want your box to look. Will you stain it, paint it, or leave it natural? Do you want to add carvings, inlays, or other embellishments?

Step 1: The Foundation

The Design: First, you need to visualize the shape of your magic box. Do you want it to be square, round, or something else entirely? Will it be a simple box or have intricate details? Sketch out your ideas on paper.
Cutting the Pieces: Based on your design, carefully measure and cut the wood for your box. Use a saw or a router to create the exact shapes you need. This is where precision is key, so take your time and measure twice.

Step 2: Assembling the Box

Joining the Pieces: You can use various methods to join the pieces of wood, like dovetail joints, mortise and tenon joints, or simple glue and nails. Again, choose what feels right for your box and the type of magic you're trying to create.
Reinforcing the Structure: If you want your box to be extra strong, you can add internal braces or a reinforcing frame. Remember, this box will be a vessel for your magic, so make sure it can stand the test of time.

Step 3: Adding the Details

Hinges and Latch: Once the box is assembled, attach the hinges and latch. Choose hinges that complement the style of your box and use a drill to make pilot holes before screwing them in.
Decorative Elements: Now it's time to add your personal touch! This is where you can really make your box unique. You can carve designs into the wood, add inlays, or even paint it with special symbols or runes that hold particular meaning for you.

Step 4: Infusing the Magic

Intention and Ritual: Now that your box is complete, it's time to infuse it with your magic. Find a quiet place where you can focus without distractions. Hold the box in your hands and visualize the magic you want to create. What do you want this box to hold? What power do you want it to possess?
Crystal and Herbs: You can place crystals or herbs inside the box to amplify your intentions. For example, amethyst can help with intuition and clarity, while rose quartz can promote love and compassion. Rosemary can enhance memory, while lavender can calm the mind. Choose what resonates with you.
Words of Power: Speak your intentions out loud as you hold the box. Create a mantra or a poem that encapsulates your wishes. Your words are powerful and will infuse the box with your energy.

Step 5: Use and Care

Your Magic Box: Your magic box is now ready! Use it as a place to store your most precious treasures, write your dreams, or focus your intentions. Every time you open it, remember the magic you poured into its creation.
Cleaning and Maintenance: To preserve the magic of your box, clean it with a soft cloth and keep it in a safe place. The wood needs time to breathe, so avoid storing it in airtight containers.

This is just a starting point for your magical woodworking journey. There are endless possibilities, and the best magic comes from your own imagination. Remember, the power is within you. Go forth and craft a magic box that will hold your dreams and amplify your spirit. And when you're done, be sure to share your creations with the world! We all need a little magic in our lives.

How to build a wooden wine barrel table for your patio


Hey there, fellow patio enthusiasts! You know that feeling, right? You're lounging in your backyard, a cool drink in hand, and you're just missing... something. Maybe a comfy chair, maybe a string of lights, but most definitely, a cool, unique table to set your drink on.

Well, hold onto your hats, because today we're diving into the world of DIY and building a wine barrel table that'll be the envy of your neighborhood. Not only is it incredibly stylish and rustic, but it's also a fun and rewarding project that won't break the bank.

The "What" and "Why" of Your Wine Barrel Table:

So, what exactly is a wine barrel table? Imagine a classic, used wine barrel, its wood seasoned and weathered with time. We'll be taking that barrel and transforming it into a sturdy, functional table perfect for your patio, porch, or even indoors.

Here's the beauty of it:

Unique & Rustic: You won't find a table like this in a furniture store! The natural imperfections of the barrel give it a character and charm that's truly unique.
Conversation Starter: This table is sure to be a topic of conversation. People will be curious about its history and how you created it.
Surprisingly Affordable: You can find used wine barrels for a steal, making this project a budget-friendly option.
DIY Satisfaction: There's something incredibly satisfying about crafting something beautiful and useful with your own hands.

Getting Started: Gather Your Crew and Supplies!

Alright, let's break down the steps and the supplies you'll need:

1. The Star of the Show: The Wine Barrel

Finding Your Barrel: Head to your local winery or brewery, or search online for used barrels. You might even find one at a vintage shop or antique store.
Types of Barrels: Oak barrels are the most common and offer a beautiful rustic look.
Sizing Up: Think about the size you need for your patio. Standard wine barrels are usually around 30 inches in diameter and 35 inches tall.

2. Essential Tools for Success

Safety Gear: Always wear safety glasses and gloves to protect yourself.
Measuring Tape & Level: For precision and a level table surface.
Circular Saw & Jigsaw: To cut the barrel and create the tabletop.
Screwdriver & Drill: For assembling the base and attaching the tabletop.
Wood Glue: To ensure strong bonds.
Sandpaper: To smooth out rough edges and give the table a polished look.
Wood Stain (Optional): To enhance the natural wood color or add a new shade.
Finish (Optional): A sealant to protect the wood and create a long-lasting finish.

3. Building Your Wine Barrel Table: Step by Step

Step 1: Preparation - The Cleanup Crew

Cleaning: First, give your barrel a good scrub with soap and water. Remove any remaining wine residue or grime. Let it dry thoroughly.
Removing the Hoops: Use a hammer and nail puller to carefully remove the metal hoops holding the barrel together. You might want to save them for future projects.

Step 2: Shaping Your Tabletop

Cutting: Use a circular saw to cut the top of the barrel horizontally to create the desired tabletop height.
Finishing Touches: Use a jigsaw to clean up the cut edges and create any decorative shapes if desired.

Step 3: Building the Base (Here's Where It Gets Creative!)

Table Base Options: Get creative! There are many ways to build a base:
Simple Wooden Legs: You can create four sturdy legs from wood planks and attach them to the barrel bottom.
X-Shaped Base: For a rustic charm, construct an "X" base using wooden beams.
Metal Stand: If you want a modern touch, use a pre-made metal table base.
Casters: Add wheels for a mobile table!

Step 4: Assembly & Finishing

Securing the Base: Attach the base to the barrel bottom using screws and wood glue.
Finishing Touches: Sand the table surface and edges to smooth out any rough spots. Apply wood stain (optional) and sealant (optional) for protection.
Personalize It: Add a personal touch with decorative hardware, paint, or even stencils!

Step 5: Unveiling Your Patio Masterpiece

The Big Reveal: Place your finished wine barrel table on your patio and enjoy its rustic charm.
Accessorize: Add a comfy cushion, a vibrant tablecloth, or a vase of fresh flowers to complete the look.

Important Notes & Tips:

Safety First: Always wear safety gear and follow proper safety precautions when using power tools.
Plan Your Design: Take some time to sketch out your table design to ensure it fits your patio space and style.
Measure Twice, Cut Once: Accurate measurements will make the assembly process much smoother.
Don't Rush: Take your time and enjoy the creative process!

Beyond the Basic Barrel Table

Feeling adventurous? Here are some ideas to take your wine barrel table to the next level:

Wine Barrel Bar: Turn your table into a bar area by adding shelves or a counter extension for serving drinks.
Wine Barrel Planter: Create a unique planter by carving out the barrel interior and filling it with soil.
Wine Barrel Bench: Add a comfortable bench to the table for extra seating.

Embrace the Rustic Charm

Your wine barrel table is more than just furniture; it's a statement piece that reflects your love for the outdoors, your DIY spirit, and a bit of old-world charm.

So, grab your tools, gather your materials, and let's build something amazing together! Enjoy the journey, and remember, the imperfections make it perfect!

How to build a wooden wine barrel table for your patio


Hey there, fellow patio enthusiasts! You know that feeling, right? You're lounging in your backyard, a cool drink in hand, and you're just missing... something. Maybe a comfy chair, maybe a string of lights, but most definitely, a cool, unique table to set your drink on.

Well, hold onto your hats, because today we're diving into the world of DIY and building a wine barrel table that'll be the envy of your neighborhood. Not only is it incredibly stylish and rustic, but it's also a fun and rewarding project that won't break the bank.

The "What" and "Why" of Your Wine Barrel Table:

So, what exactly is a wine barrel table? Imagine a classic, used wine barrel, its wood seasoned and weathered with time. We'll be taking that barrel and transforming it into a sturdy, functional table perfect for your patio, porch, or even indoors.

Here's the beauty of it:

Unique & Rustic: You won't find a table like this in a furniture store! The natural imperfections of the barrel give it a character and charm that's truly unique.
Conversation Starter: This table is sure to be a topic of conversation. People will be curious about its history and how you created it.
Surprisingly Affordable: You can find used wine barrels for a steal, making this project a budget-friendly option.
DIY Satisfaction: There's something incredibly satisfying about crafting something beautiful and useful with your own hands.

Getting Started: Gather Your Crew and Supplies!

Alright, let's break down the steps and the supplies you'll need:

1. The Star of the Show: The Wine Barrel

Finding Your Barrel: Head to your local winery or brewery, or search online for used barrels. You might even find one at a vintage shop or antique store.
Types of Barrels: Oak barrels are the most common and offer a beautiful rustic look.
Sizing Up: Think about the size you need for your patio. Standard wine barrels are usually around 30 inches in diameter and 35 inches tall.

2. Essential Tools for Success

Safety Gear: Always wear safety glasses and gloves to protect yourself.
Measuring Tape & Level: For precision and a level table surface.
Circular Saw & Jigsaw: To cut the barrel and create the tabletop.
Screwdriver & Drill: For assembling the base and attaching the tabletop.
Wood Glue: To ensure strong bonds.
Sandpaper: To smooth out rough edges and give the table a polished look.
Wood Stain (Optional): To enhance the natural wood color or add a new shade.
Finish (Optional): A sealant to protect the wood and create a long-lasting finish.

3. Building Your Wine Barrel Table: Step by Step

Step 1: Preparation - The Cleanup Crew

Cleaning: First, give your barrel a good scrub with soap and water. Remove any remaining wine residue or grime. Let it dry thoroughly.
Removing the Hoops: Use a hammer and nail puller to carefully remove the metal hoops holding the barrel together. You might want to save them for future projects.

Step 2: Shaping Your Tabletop

Cutting: Use a circular saw to cut the top of the barrel horizontally to create the desired tabletop height.
Finishing Touches: Use a jigsaw to clean up the cut edges and create any decorative shapes if desired.

Step 3: Building the Base (Here's Where It Gets Creative!)

Table Base Options: Get creative! There are many ways to build a base:
Simple Wooden Legs: You can create four sturdy legs from wood planks and attach them to the barrel bottom.
X-Shaped Base: For a rustic charm, construct an "X" base using wooden beams.
Metal Stand: If you want a modern touch, use a pre-made metal table base.
Casters: Add wheels for a mobile table!

Step 4: Assembly & Finishing

Securing the Base: Attach the base to the barrel bottom using screws and wood glue.
Finishing Touches: Sand the table surface and edges to smooth out any rough spots. Apply wood stain (optional) and sealant (optional) for protection.
Personalize It: Add a personal touch with decorative hardware, paint, or even stencils!

Step 5: Unveiling Your Patio Masterpiece

The Big Reveal: Place your finished wine barrel table on your patio and enjoy its rustic charm.
Accessorize: Add a comfy cushion, a vibrant tablecloth, or a vase of fresh flowers to complete the look.

Important Notes & Tips:

Safety First: Always wear safety gear and follow proper safety precautions when using power tools.
Plan Your Design: Take some time to sketch out your table design to ensure it fits your patio space and style.
Measure Twice, Cut Once: Accurate measurements will make the assembly process much smoother.
Don't Rush: Take your time and enjoy the creative process!

Beyond the Basic Barrel Table

Feeling adventurous? Here are some ideas to take your wine barrel table to the next level:

Wine Barrel Bar: Turn your table into a bar area by adding shelves or a counter extension for serving drinks.
Wine Barrel Planter: Create a unique planter by carving out the barrel interior and filling it with soil.
Wine Barrel Bench: Add a comfortable bench to the table for extra seating.

Embrace the Rustic Charm

Your wine barrel table is more than just furniture; it's a statement piece that reflects your love for the outdoors, your DIY spirit, and a bit of old-world charm.

So, grab your tools, gather your materials, and let's build something amazing together! Enjoy the journey, and remember, the imperfections make it perfect!

Wednesday, 6 November 2024


Summer evenings are made for relaxing, and what better way to enjoy them than in a comfortable Adirondack chair? Forget store-bought, mass-produced models â€" build your own! This DIY project is achievable even for beginners, and the satisfaction of crafting your perfect lounging spot is priceless.

Gather your materials:

Lumber: Cedar or redwood are ideal for their durability and natural resistance to weather. Choose 2x4s and 2x6s, ensuring they’re straight and free of knots.
Screws: Use exterior-grade screws to secure the chair's construction.
Wood glue: Provides extra strength and prevents wood movement.
Safety gear: Safety glasses, gloves, and dust mask are essential for your protection.

Let's build!

1. Cut the pieces: You'll need multiple pieces of varying lengths. Online resources offer detailed plans with precise measurements.
2. Assemble the frame: Start by attaching the seat supports to the legs, then add the back supports and the armrests.
3. Secure the seat and back: Use wood glue and screws to join the seat boards and back slats.
4. Finish with style: Sand the chair thoroughly for a smooth finish. Then, apply a weather-resistant stain or paint to protect the wood and personalize the chair's look.

Boosting comfort:

Add a cushion: For ultimate relaxation, craft a custom cushion to fit your chair. You can use foam padding and fabric of your choice.
Incorporate a footrest: Add a matching footrest for optimal comfort.
Consider adding armrests: While many Adirondack chairs have armrests, you can customize yours to ensure the perfect fit.

Pro-tips for success:

Invest in quality tools: A circular saw, drill, and sander will make the project easier and more accurate.
Don't rush the process: Take your time, ensuring each step is done correctly for a durable and safe chair.
Check for stability: After assembly, double-check that the chair is stable and secure.

Building your own Adirondack chair is a rewarding experience that allows you to customize your summer evenings. With a little effort and these tips, you'll be relaxing in your own creation in no time!


Summer evenings are made for relaxing, and what better way to enjoy them than in a comfortable Adirondack chair? Forget store-bought, mass-produced models â€" build your own! This DIY project is achievable even for beginners, and the satisfaction of crafting your perfect lounging spot is priceless.

Gather your materials:

Lumber: Cedar or redwood are ideal for their durability and natural resistance to weather. Choose 2x4s and 2x6s, ensuring they’re straight and free of knots.
Screws: Use exterior-grade screws to secure the chair's construction.
Wood glue: Provides extra strength and prevents wood movement.
Safety gear: Safety glasses, gloves, and dust mask are essential for your protection.

Let's build!

1. Cut the pieces: You'll need multiple pieces of varying lengths. Online resources offer detailed plans with precise measurements.
2. Assemble the frame: Start by attaching the seat supports to the legs, then add the back supports and the armrests.
3. Secure the seat and back: Use wood glue and screws to join the seat boards and back slats.
4. Finish with style: Sand the chair thoroughly for a smooth finish. Then, apply a weather-resistant stain or paint to protect the wood and personalize the chair's look.

Boosting comfort:

Add a cushion: For ultimate relaxation, craft a custom cushion to fit your chair. You can use foam padding and fabric of your choice.
Incorporate a footrest: Add a matching footrest for optimal comfort.
Consider adding armrests: While many Adirondack chairs have armrests, you can customize yours to ensure the perfect fit.

Pro-tips for success:

Invest in quality tools: A circular saw, drill, and sander will make the project easier and more accurate.
Don't rush the process: Take your time, ensuring each step is done correctly for a durable and safe chair.
Check for stability: After assembly, double-check that the chair is stable and secure.

Building your own Adirondack chair is a rewarding experience that allows you to customize your summer evenings. With a little effort and these tips, you'll be relaxing in your own creation in no time!

How to make wood flat:
How to make wood flat: use informal tone,

Alright, so you've got this piece of wood and it's all wonky, right? Like a piece of spaghetti that's seen better days. You want it flat, smooth, and ready for your next masterpiece. Well, buckle up, because here's the lowdown on how to make wood flat:

Why Flatten Wood?

First off, why even bother? Well, imagine trying to build a table on a wobbly foundation. That's what you're dealing with if your wood isn't flat. It's gonna warp, things won't fit right, and your project will be a mess. A flat piece of wood is like a solid foundation â€" it gives you a stable base to work with, making your projects stronger, more durable, and a whole lot easier to build.

How to Flatten Wood: The Basics

The key to flattening wood is removing material from the high spots. Think of it like sculpting â€" you're chiseling away until you achieve the desired shape.

Here's the basic breakdown:

1. Choose Your Weapon:
- Hand Planes: These are the classic tools for flattening wood. They're a bit like mini-planers, using a blade to shave off thin layers of wood. You can get fancy with different sizes and types, but a basic block plane is a good place to start.
- Power Planers: If you're dealing with a larger piece of wood or want to get the job done faster, a power planer is your best friend. It's basically a hand plane on steroids, but you need to be careful! Always wear safety glasses and keep your fingers well away from the spinning blades.
- Sandpaper: You can also use sandpaper to flatten wood, especially for smaller projects or finishing touches. Start with coarse grit and work your way up to finer grits for a smooth finish.

2. Find Your Reference:
- You need a flat surface to measure against. A straight edge, a level, or even a long piece of wood can work. Place your reference on the wood and see where the gaps are. This will tell you where to remove material.

3. Start Planing:
- Hand Plane: Work in small, overlapping strokes. Go with the grain of the wood for the best results. Keep an eye on your reference and gradually remove material from the high spots.
- Power Planer: Make passes along the length of the wood, removing a little material at a time. Again, keep an eye on your reference and adjust your planing depth as needed. Remember, start with a shallow depth and work your way up if necessary.

4. Check and Adjust:
- After each pass, check your work with your reference. Continue planing and sanding until you reach a flat surface.

Getting Fancy: Jointing and Planing

If you're serious about getting a perfectly flat surface, you might want to invest in a jointer and a planer.

Jointer: This machine creates a perfectly straight edge on the wood, which is crucial for planing.
Planer: This machine removes material from the entire surface of the wood, creating a flat and smooth finish.

Think of it like this: You first straighten one edge of the wood with the jointer, then use the planer to smooth out the whole surface while referencing the straight edge.

Key Takeaways:

- Flattening wood is all about removing material from the high spots.
- There are different tools for different tasks, choose the right one for your project.
- Patience is key. Take your time and check your work often.

Remember, practice makes perfect. The more you work with wood, the better you'll get at flattening it. And trust me, once you master this skill, your woodworking projects will be smoother than a baby's bottom!

How to make wood flat:
How to make wood flat: use informal tone,

Alright, so you've got this piece of wood and it's all wonky, right? Like a piece of spaghetti that's seen better days. You want it flat, smooth, and ready for your next masterpiece. Well, buckle up, because here's the lowdown on how to make wood flat:

Why Flatten Wood?

First off, why even bother? Well, imagine trying to build a table on a wobbly foundation. That's what you're dealing with if your wood isn't flat. It's gonna warp, things won't fit right, and your project will be a mess. A flat piece of wood is like a solid foundation â€" it gives you a stable base to work with, making your projects stronger, more durable, and a whole lot easier to build.

How to Flatten Wood: The Basics

The key to flattening wood is removing material from the high spots. Think of it like sculpting â€" you're chiseling away until you achieve the desired shape.

Here's the basic breakdown:

1. Choose Your Weapon:
- Hand Planes: These are the classic tools for flattening wood. They're a bit like mini-planers, using a blade to shave off thin layers of wood. You can get fancy with different sizes and types, but a basic block plane is a good place to start.
- Power Planers: If you're dealing with a larger piece of wood or want to get the job done faster, a power planer is your best friend. It's basically a hand plane on steroids, but you need to be careful! Always wear safety glasses and keep your fingers well away from the spinning blades.
- Sandpaper: You can also use sandpaper to flatten wood, especially for smaller projects or finishing touches. Start with coarse grit and work your way up to finer grits for a smooth finish.

2. Find Your Reference:
- You need a flat surface to measure against. A straight edge, a level, or even a long piece of wood can work. Place your reference on the wood and see where the gaps are. This will tell you where to remove material.

3. Start Planing:
- Hand Plane: Work in small, overlapping strokes. Go with the grain of the wood for the best results. Keep an eye on your reference and gradually remove material from the high spots.
- Power Planer: Make passes along the length of the wood, removing a little material at a time. Again, keep an eye on your reference and adjust your planing depth as needed. Remember, start with a shallow depth and work your way up if necessary.

4. Check and Adjust:
- After each pass, check your work with your reference. Continue planing and sanding until you reach a flat surface.

Getting Fancy: Jointing and Planing

If you're serious about getting a perfectly flat surface, you might want to invest in a jointer and a planer.

Jointer: This machine creates a perfectly straight edge on the wood, which is crucial for planing.
Planer: This machine removes material from the entire surface of the wood, creating a flat and smooth finish.

Think of it like this: You first straighten one edge of the wood with the jointer, then use the planer to smooth out the whole surface while referencing the straight edge.

Key Takeaways:

- Flattening wood is all about removing material from the high spots.
- There are different tools for different tasks, choose the right one for your project.
- Patience is key. Take your time and check your work often.

Remember, practice makes perfect. The more you work with wood, the better you'll get at flattening it. And trust me, once you master this skill, your woodworking projects will be smoother than a baby's bottom!

How to refresh your round wood coffee table on a budget
How to style a round coffee table â€" Artofit

Consider increasing your apparel budget by selling items you no longer Fashion experts from across the country offer tips on how to refresh your wardrobe for less. First, review your bank

Insight Oasis How to refresh your round wood coffee table on a budget

If you are looking for ways to refresh your home without breaking the bank, you have come to the right place! There are plenty of creative and budget-friendly your dining table to create

How To Refresh Your Home On A Budget
10 Ideas For Stylish Round Wood Coffee Tables To Elevate Your Living

Here are some tips on how to refresh your merchandising for customers. Before you start changing your displays, have a clear plan and strategy for your merchandising. Consider your goals Fashion experts from across the country offer tips on how to refresh your wardrobe A little can go far when you decide on your direction: Either buy many cheap things or one or two expensive Choose from Round Wooden Coffee Table stock illustrations from iStock. Find high-quality royalty-free vector images that you won't find anywhere else. Video Back Videos home Signature collection

How do you refresh your merchandising for customers?
Diy Round Farmhouse Coffee Table - Diy Round Farmhouse Coffee Table

As you grow professionally, you may need to refresh your personal brand to align with your current situation, aspirations, and audience. Here are some tips on how to do that effectively. Upgrade your living room and they deserve a coffee table that doubles as a work of art in its own right; you found the perfect MCM-inspired, scratch-proof couch for you and Fluffy, and now you

How to Refresh Your Wardrobe Without Breaking Your Budget
How To Decorate Your Wood Coffee Table - Coffee Table Decor

Build JWT Refresh Token in the Java Spring Boot Application. You can know how to expire the JWT, then renew the Access Token with Refresh Token. The instruction can be found at: Spring Boot Refresh From low-cost refreshes you can do in just a couple of hours, to ways to keep the cost of bigger changes in check, here are ideas for how to renovate a bathroom on a budget some surfaces in your

How to refresh your round wood coffee table on a budget - to aid produce the interest of our visitors may also be happy to produce these pages. increasing the standard of this content might you put on in the future so that you can really understand just after here posting. At long last, not necessarily just a few ideas that must be made to convince you. yet as a result of limits regarding terminology, we're able to basically show typically the How do you refresh your merchandising for customers? talk in place in this article

How to refresh your round wood coffee table on a budget
How to style a round coffee table â€" Artofit

Consider increasing your apparel budget by selling items you no longer Fashion experts from across the country offer tips on how to refresh your wardrobe for less. First, review your bank

Insight Oasis How to refresh your round wood coffee table on a budget

If you are looking for ways to refresh your home without breaking the bank, you have come to the right place! There are plenty of creative and budget-friendly your dining table to create

How To Refresh Your Home On A Budget
10 Ideas For Stylish Round Wood Coffee Tables To Elevate Your Living

Here are some tips on how to refresh your merchandising for customers. Before you start changing your displays, have a clear plan and strategy for your merchandising. Consider your goals Fashion experts from across the country offer tips on how to refresh your wardrobe A little can go far when you decide on your direction: Either buy many cheap things or one or two expensive Choose from Round Wooden Coffee Table stock illustrations from iStock. Find high-quality royalty-free vector images that you won't find anywhere else. Video Back Videos home Signature collection

How do you refresh your merchandising for customers?
Diy Round Farmhouse Coffee Table - Diy Round Farmhouse Coffee Table

As you grow professionally, you may need to refresh your personal brand to align with your current situation, aspirations, and audience. Here are some tips on how to do that effectively. Upgrade your living room and they deserve a coffee table that doubles as a work of art in its own right; you found the perfect MCM-inspired, scratch-proof couch for you and Fluffy, and now you

How to Refresh Your Wardrobe Without Breaking Your Budget
How To Decorate Your Wood Coffee Table - Coffee Table Decor

Build JWT Refresh Token in the Java Spring Boot Application. You can know how to expire the JWT, then renew the Access Token with Refresh Token. The instruction can be found at: Spring Boot Refresh From low-cost refreshes you can do in just a couple of hours, to ways to keep the cost of bigger changes in check, here are ideas for how to renovate a bathroom on a budget some surfaces in your

How to refresh your round wood coffee table on a budget - to aid produce the interest of our visitors may also be happy to produce these pages. increasing the standard of this content might you put on in the future so that you can really understand just after here posting. At long last, not necessarily just a few ideas that must be made to convince you. yet as a result of limits regarding terminology, we're able to basically show typically the How do you refresh your merchandising for customers? talk in place in this article

Round bamboo wood coffee table for eco-friendly homes
An Eco-friendly Aloha Bamboo Bundled Coffee Table Is All You Need To

Many people use the terms end table and side table interchangeably, but there’s actually a difference between these two pieces of furniture. Living room end tables are intended to be placed next to a

Unraveling Paradigms Round bamboo wood coffee table for eco-friendly homes

Despite the small sizes, coffee tables are placed in the center of a room and will likely be the first thing that catches your eyes. That’s why it’s important to find a good one that matches your

9 Best Coffee Tables for Sectionals of 2024
Bamboo Coffee Tables - Ideas on Foter

Upgrade your living room’s ambiance with the best Noguchi coffee tables and their wallet-friendly cousins from sinuous shape and use of natural wood and glass materials, the piece’s Here at Very, we stock a variety of coffee tables from top UK brands like GFW, Julian Bowen and our own Very Home. Look out for rectangular designs in classic oak, mid-century inspired low oval table With rising temperatures in Davao City, there's a growing preference for eco-friendly, sustainable, and energy-efficient homes. Several developers are responding to this demand. One notable project is

Where to Buy Noguchi Coffee Tables and Affordable Alternatives
High quality Creative Round Coffee Table Eco friendly Bamboo Living

Indulge in retail therapy this festive season with our Great Festive Sale on coasters. Discover a variety of stylish and functional options designed to protect your surfaces and add a touch of As the world leans towards sustainability, wood jewelry is the new eco-friendly fashion statement. This article delves into its allure, covering the history, key ideas, and how to incorporate

Coffee Tables
Купить Мебель для дома | Eco-friendly Bamboo Creative Coffee Table

With over a decade of crypto coverage, Cryptonews delivers authoritative insights you can rely on. Our veteran team of journalists and analysts combines in-depth market knowledge with hands-on testing The award -- presented by the building industry association of Clark county -- recognized Mountain wood homes' work on a project completed in camas, titled "Camas soul." this home remodel provides

Round bamboo wood coffee table for eco-friendly homes - to assist you to improve the eye of our tourists also are incredibly to help make this site. boosting the caliber of the content will probably most of us put on a later date so that you could certainly fully understand subsequent to encountered this put up. At last, isn't a handful of key phrases that really must be which is designed to force one. and yet a result of policies from tongue, we are able to just existing the actual Where to Buy Noguchi Coffee Tables and Affordable Alternatives argument all the way up in this case

Round bamboo wood coffee table for eco-friendly homes
An Eco-friendly Aloha Bamboo Bundled Coffee Table Is All You Need To

Many people use the terms end table and side table interchangeably, but there’s actually a difference between these two pieces of furniture. Living room end tables are intended to be placed next to a

Unraveling Paradigms Round bamboo wood coffee table for eco-friendly homes

Despite the small sizes, coffee tables are placed in the center of a room and will likely be the first thing that catches your eyes. That’s why it’s important to find a good one that matches your

9 Best Coffee Tables for Sectionals of 2024
Bamboo Coffee Tables - Ideas on Foter

Upgrade your living room’s ambiance with the best Noguchi coffee tables and their wallet-friendly cousins from sinuous shape and use of natural wood and glass materials, the piece’s Here at Very, we stock a variety of coffee tables from top UK brands like GFW, Julian Bowen and our own Very Home. Look out for rectangular designs in classic oak, mid-century inspired low oval table With rising temperatures in Davao City, there's a growing preference for eco-friendly, sustainable, and energy-efficient homes. Several developers are responding to this demand. One notable project is

Where to Buy Noguchi Coffee Tables and Affordable Alternatives
High quality Creative Round Coffee Table Eco friendly Bamboo Living

Indulge in retail therapy this festive season with our Great Festive Sale on coasters. Discover a variety of stylish and functional options designed to protect your surfaces and add a touch of As the world leans towards sustainability, wood jewelry is the new eco-friendly fashion statement. This article delves into its allure, covering the history, key ideas, and how to incorporate

Coffee Tables
Купить Мебель для дома | Eco-friendly Bamboo Creative Coffee Table

With over a decade of crypto coverage, Cryptonews delivers authoritative insights you can rely on. Our veteran team of journalists and analysts combines in-depth market knowledge with hands-on testing The award -- presented by the building industry association of Clark county -- recognized Mountain wood homes' work on a project completed in camas, titled "Camas soul." this home remodel provides

Round bamboo wood coffee table for eco-friendly homes - to assist you to improve the eye of our tourists also are incredibly to help make this site. boosting the caliber of the content will probably most of us put on a later date so that you could certainly fully understand subsequent to encountered this put up. At last, isn't a handful of key phrases that really must be which is designed to force one. and yet a result of policies from tongue, we are able to just existing the actual Where to Buy Noguchi Coffee Tables and Affordable Alternatives argument all the way up in this case

Round vs. rectangular coffee tables: which fits your style?
Round Vs Rectangle (or Square) Coffee Table â€" a Serious Designer

Coffee tables are the centerpieces of your living room, but sometimes, it can get difficult to choose the right one. As simple as it may seem when choosing a coffee table, size, shape, and style

Insightful Sojourns Round vs. rectangular coffee tables: which fits your style?

For inspiration for your next coffee table purchase, check out these styles that both to choose a coffee table that fits your room’s dimensions. A compact, round, or oval-shaped table might work

Coffee Tables for Small Spaces
A Guide To Round And Rectangular Coffee Tables | Swyft

For a small living room, the right furniture makes the space comfortable and stylish. Look for pieces that fit well and are practical. Prioritizing size and function helps create a cozy, welcoming Explore the best coffee table with stools to enhance your living room decor. This versatile, space-saving piece offers extra seating & style for any occasion. Looking for the perfect side table for your living room? Check out our list of the best side tables that blend in with all interiors.

Stylish Furniture That Fits Perfectly in Small Living Rooms
26+ Coffee Table Ideas to Elevate Your Living Room - Jenna Kate at Home

Prepare yourself for an incredible Black November at OK Home, savings are available every day throughout the entire month! Tables, coffee tables, consoles and benches that meet all tastes and requirements. Thanks to the different available combinations the collection fits in all situations: home, contract spaces and also

Best coffee table with stools: Top 8 options for chic living room decor that combine style and functionality
Coffee Tables Round: Style And Function For Every Home - Table Round Ideas

Whether its for drinks and nibbles, or displaying your of coffee tables from top UK brands like GFW, Julian Bowen and our own Very Home. Look out for rectangular designs in classic oak, So, whether you’ve got a blanket stash that’s out of control or need a place to hide seasonal pillows, you definitely need to put a storage ottoman on your shopping list. Lucky for you, I did the werk

Round vs. rectangular coffee tables: which fits your style? - to help you acquire the eye of our own guests can be boastful to build this page. developing products you can released is going to most people test in the future to enable you to actually comprehend after reading this post. Finally, it is not a few words that must definitely be designed to persuade a person. yet as a result of limits regarding terminology, we're able to basically show typically the Stylish Furniture That Fits Perfectly in Small Living Rooms discourse right up listed here

Round vs. rectangular coffee tables: which fits your style?
Round Vs Rectangle (or Square) Coffee Table â€" a Serious Designer

Coffee tables are the centerpieces of your living room, but sometimes, it can get difficult to choose the right one. As simple as it may seem when choosing a coffee table, size, shape, and style

Insightful Sojourns Round vs. rectangular coffee tables: which fits your style?

For inspiration for your next coffee table purchase, check out these styles that both to choose a coffee table that fits your room’s dimensions. A compact, round, or oval-shaped table might work

Coffee Tables for Small Spaces
A Guide To Round And Rectangular Coffee Tables | Swyft

For a small living room, the right furniture makes the space comfortable and stylish. Look for pieces that fit well and are practical. Prioritizing size and function helps create a cozy, welcoming Explore the best coffee table with stools to enhance your living room decor. This versatile, space-saving piece offers extra seating & style for any occasion. Looking for the perfect side table for your living room? Check out our list of the best side tables that blend in with all interiors.

Stylish Furniture That Fits Perfectly in Small Living Rooms
26+ Coffee Table Ideas to Elevate Your Living Room - Jenna Kate at Home

Prepare yourself for an incredible Black November at OK Home, savings are available every day throughout the entire month! Tables, coffee tables, consoles and benches that meet all tastes and requirements. Thanks to the different available combinations the collection fits in all situations: home, contract spaces and also

Best coffee table with stools: Top 8 options for chic living room decor that combine style and functionality
Coffee Tables Round: Style And Function For Every Home - Table Round Ideas

Whether its for drinks and nibbles, or displaying your of coffee tables from top UK brands like GFW, Julian Bowen and our own Very Home. Look out for rectangular designs in classic oak, So, whether you’ve got a blanket stash that’s out of control or need a place to hide seasonal pillows, you definitely need to put a storage ottoman on your shopping list. Lucky for you, I did the werk

Round vs. rectangular coffee tables: which fits your style? - to help you acquire the eye of our own guests can be boastful to build this page. developing products you can released is going to most people test in the future to enable you to actually comprehend after reading this post. Finally, it is not a few words that must definitely be designed to persuade a person. yet as a result of limits regarding terminology, we're able to basically show typically the Stylish Furniture That Fits Perfectly in Small Living Rooms discourse right up listed here

How to make a driftwood coffee table
How to make a DIY Driftwood Coffee Table

Unsurprisingly, there are some key rules to follow that will ensure your coffee table will look fabulous on top and be functional to boot â€" adding it to your list of living room ideas will make your

Uncharted Wisdom How to make a driftwood coffee table

You see, coffee table books tend to be big, weighty and hardback, meaning they can add depth and make a good base for other decorative pieces to be layered on top. In this instance I’ve used

Big Trends Small Spaces: How to create a stylish coffee tablescape
How to make a DIY Driftwood Coffee Table

Coffee tables are mostly small, flat tables that fit perfectly into a seating landscape in the living room. Depending on their shape, the coffee tables are practical so that things can be stored on or Forget received wisdom that you shouldn't have a coffee table because it makes a living room look smaller â€" that's not always, nor necessarily, the case. And anyway, what if you really need one for “That’ll be £4.20 please…” If the cost of your coffee is causing you to splutter into your cappuccino, it might be time to switch to making your wall lights and table lamps for

Coffee tables
How to make a DIY Driftwood Coffee Table

Cut the top off the box so you are left with three sides and a base. This will make goals for each side of the football table. Hold one goal against the side of your bigger box and trace around it Skip the long lines at the shop and make an iced coffee drink yourself. If you’re already a coffee drinker, you’re likely familiar with forgetting your cup of coffee and finding it cold hours later.

Does a coffee table make a room look bigger or smaller? Design experts share a magic formula
How to make a DIY Driftwood Coffee Table

If you’re of the camp that coffee + ice cream = iced coffee, we’re here to tell you that you made a milkshake and while it’s delicious, this is not what we’re here to discuss today. Easily the most

How to make a driftwood coffee table - to help you acquire the eye of our own guests are usually pleased in making these pages. strengthening the products this great article can we all test a later date to help you genuinely recognize subsequent to encountered this put up. In conclusion, this isn't a small number of sayings that really must be built to encourage an individual. yet as a result of limits regarding terminology, you can merely found your Coffee tables controversy up right

How to make a driftwood coffee table
How to make a DIY Driftwood Coffee Table

Unsurprisingly, there are some key rules to follow that will ensure your coffee table will look fabulous on top and be functional to boot â€" adding it to your list of living room ideas will make your

Uncharted Wisdom How to make a driftwood coffee table

You see, coffee table books tend to be big, weighty and hardback, meaning they can add depth and make a good base for other decorative pieces to be layered on top. In this instance I’ve used

Big Trends Small Spaces: How to create a stylish coffee tablescape
How to make a DIY Driftwood Coffee Table

Coffee tables are mostly small, flat tables that fit perfectly into a seating landscape in the living room. Depending on their shape, the coffee tables are practical so that things can be stored on or Forget received wisdom that you shouldn't have a coffee table because it makes a living room look smaller â€" that's not always, nor necessarily, the case. And anyway, what if you really need one for “That’ll be £4.20 please…” If the cost of your coffee is causing you to splutter into your cappuccino, it might be time to switch to making your wall lights and table lamps for

Coffee tables
How to make a DIY Driftwood Coffee Table

Cut the top off the box so you are left with three sides and a base. This will make goals for each side of the football table. Hold one goal against the side of your bigger box and trace around it Skip the long lines at the shop and make an iced coffee drink yourself. If you’re already a coffee drinker, you’re likely familiar with forgetting your cup of coffee and finding it cold hours later.

Does a coffee table make a room look bigger or smaller? Design experts share a magic formula
How to make a DIY Driftwood Coffee Table

If you’re of the camp that coffee + ice cream = iced coffee, we’re here to tell you that you made a milkshake and while it’s delicious, this is not what we’re here to discuss today. Easily the most

How to make a driftwood coffee table - to help you acquire the eye of our own guests are usually pleased in making these pages. strengthening the products this great article can we all test a later date to help you genuinely recognize subsequent to encountered this put up. In conclusion, this isn't a small number of sayings that really must be built to encourage an individual. yet as a result of limits regarding terminology, you can merely found your Coffee tables controversy up right